Forte HSD1G-105G motoblock - a reliable and unpretentious assistant in the household
I started thinking about buying amotoblock with the beginning of the construction of a fence, gates and arranging the territory of the estate. This practically made it impossible to use even the services of a minitractor - there was simply no way to drive in. And manual digging between trees and bushes took a lot of time on such a short weekend.
At first, I was thinking about buying a light walk-behind tractor, so that it could also be transported by car to the country for gardening.But it so happened that my best man, who was also "scratching his head" over this issue, already after the completion of the spring work, said at the beginning of the summer that there was advice from a dealer he knew to take exactly themodel Forte walk-behind tractor HSD1G-105G, and also a good offer with a discount on the walk-behind tractor itself and onattachment. So he gave himself, and as it turned out not only himself, a gift. And I never regretted it.
In the kit for the walk-behind tractor, 10" wheels withrubber were taken (because there were also 8" wheels to choose from), a simpleplow, a universal hitch,a potato digger of the "dolphin" type and a diskwrapper.
Further I offer an overview of the walk-behind tractor in a series of photos (there are really a lot of photos, I hope you have the patience to look through everything, but as a bonus at the end of the technical specifications from the manufacturer and a link to the manual, which is really good) with comments (special thanks to my son for his help, I would not have been able to do it myself).
By the way, this was done during the work of preparing the site for winter planting onions, garlic and strawberries in this dry autumn of 2019 on loam (it is practically impossible to insert a shovel without the help of a foot).
I apologize at once for the perhaps not entirely correct name of the individual parts of the walk-behind tractor that I will describe.
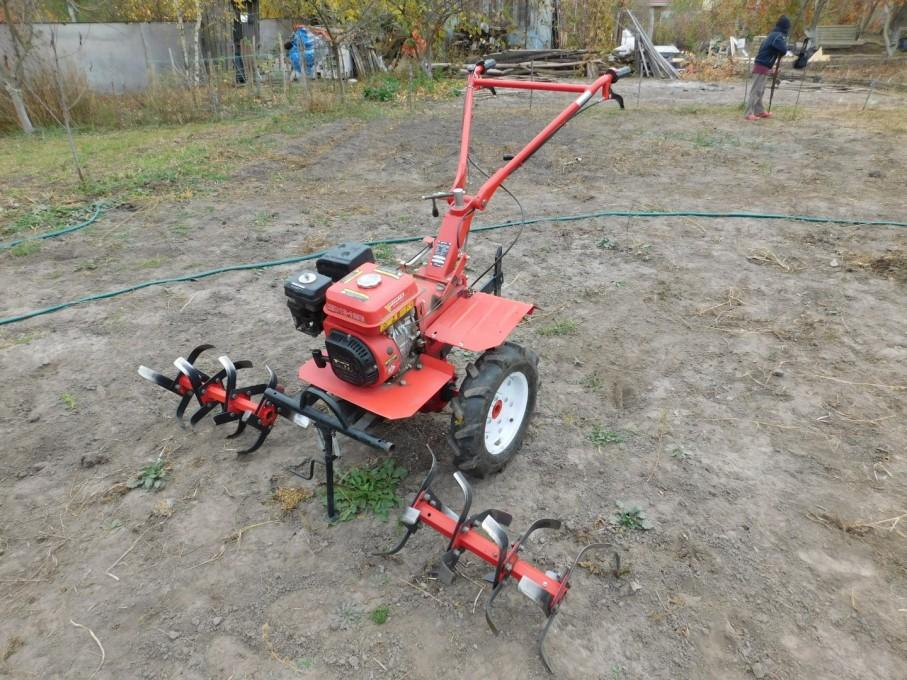
General appearance of the walk-behind tractor. Cutters are prepared for changing wheels. And also, the total grip width is 105 cm, but it can be adjusted. The cutters are collapsible, in fact each one is in a ratio of 2:1.
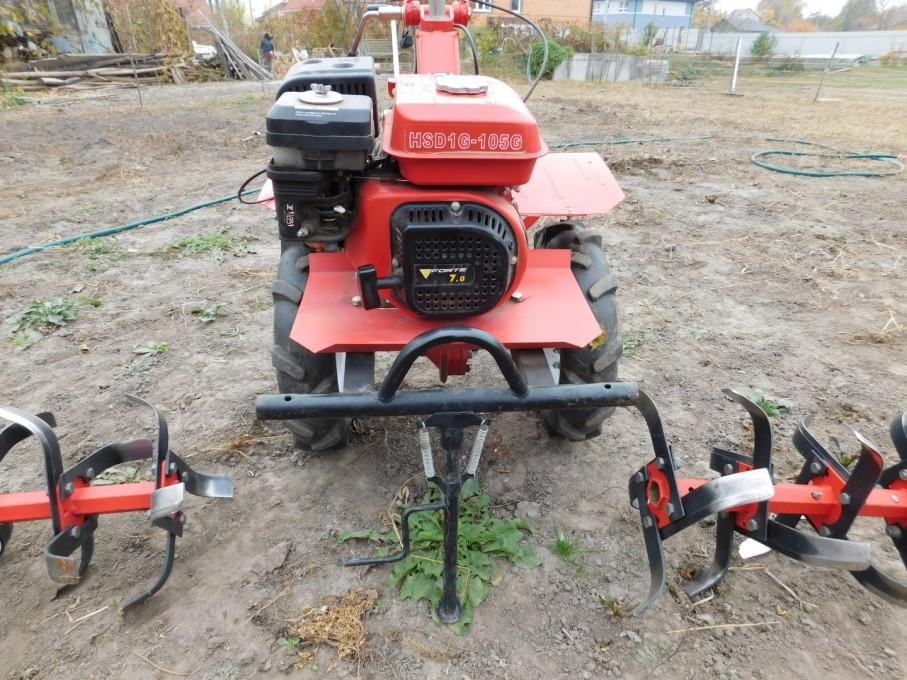
View of the walk-behind tractor from the front: we can see such an interesting feature as the possibility of transporting the cutters on a part of the structure with a support leg.
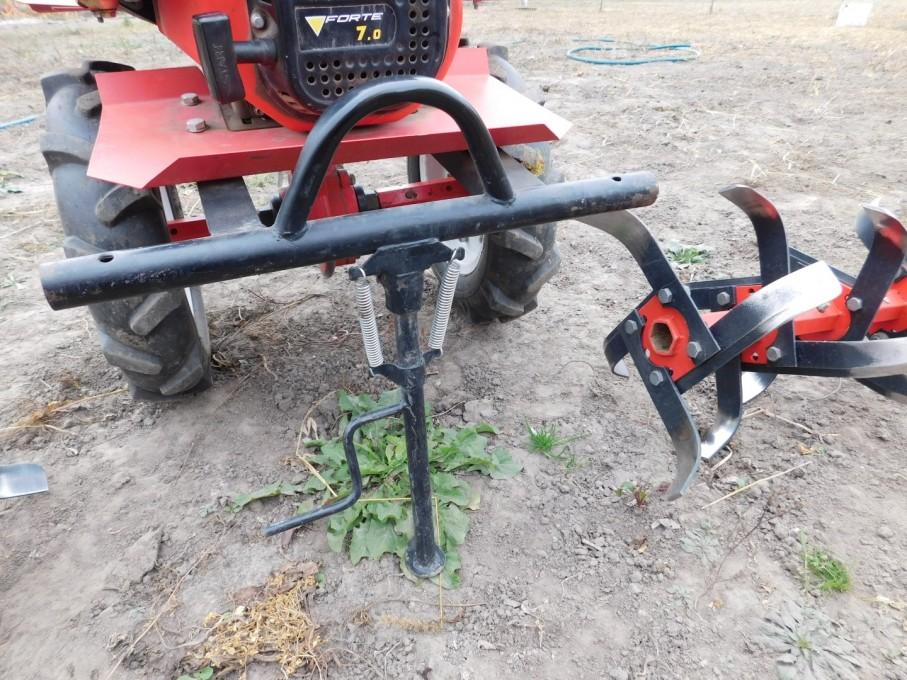
Here, if necessary, you can hang weights for working with heavy soils with cutters or a plow. And it does not necessarily have to be factory, after all, anything that does not disturb the balance of the unit. I will say that such weights were even a small landing on top, he was very interested. But, of course, you shouldn't do that. It's not a horse after all.
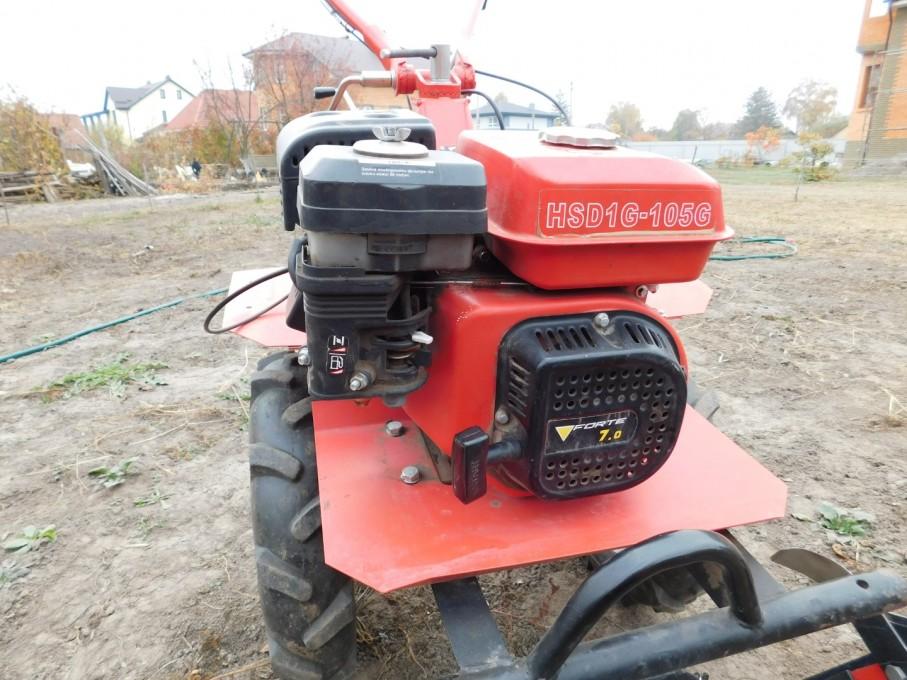
The starter in this motoblock is manual, but fail-safe (thu-thu-thu). But... in a year or two he had to go through it - he didn't turn the rope all the way and wedged it. It turned out that the fault was the factory lubricant of the spring, which thickened with dust almost to resin. The fact is that the cooling fan impeller is structurally behind the starter, so it draws dust. So, after work, if there is an opportunity to blow with the compressor here and around the engine, it will not be superfluous. Or at least with a brush, for peace of mind.
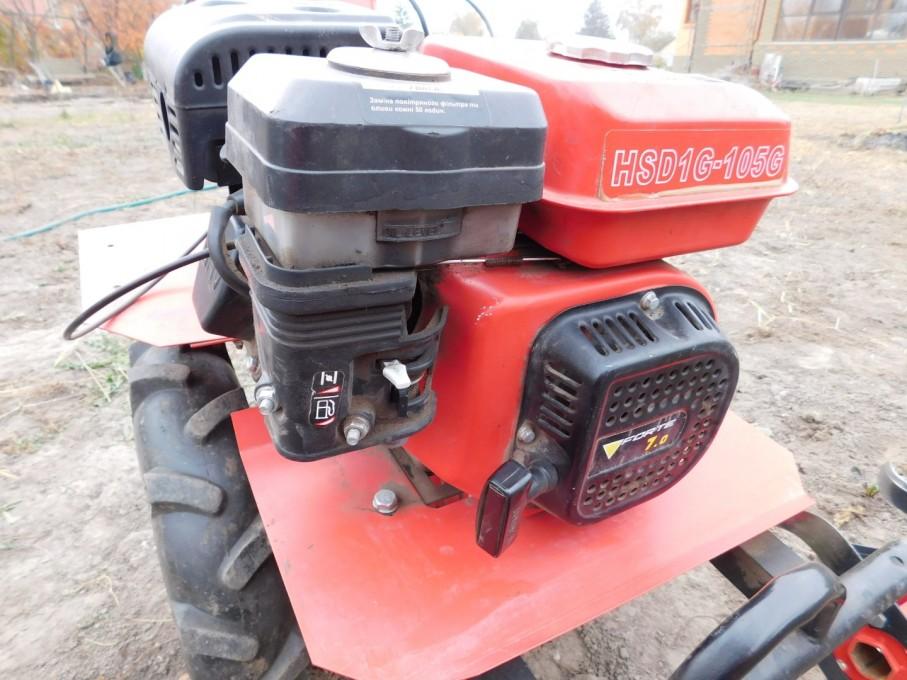
On the upper left is an air filter with an oil bath, below (white and gray) is an air damper, and even lower is a black, fuel tap. Gliding to the extreme right (from this angle of view) for both, - fully open. Currently, both are closed in the photo. The same is true for storage. It is not necessary to burn off gasoline, as recommended for chainsaws and chainsaws, before storage. The engine is still 4-stroke.
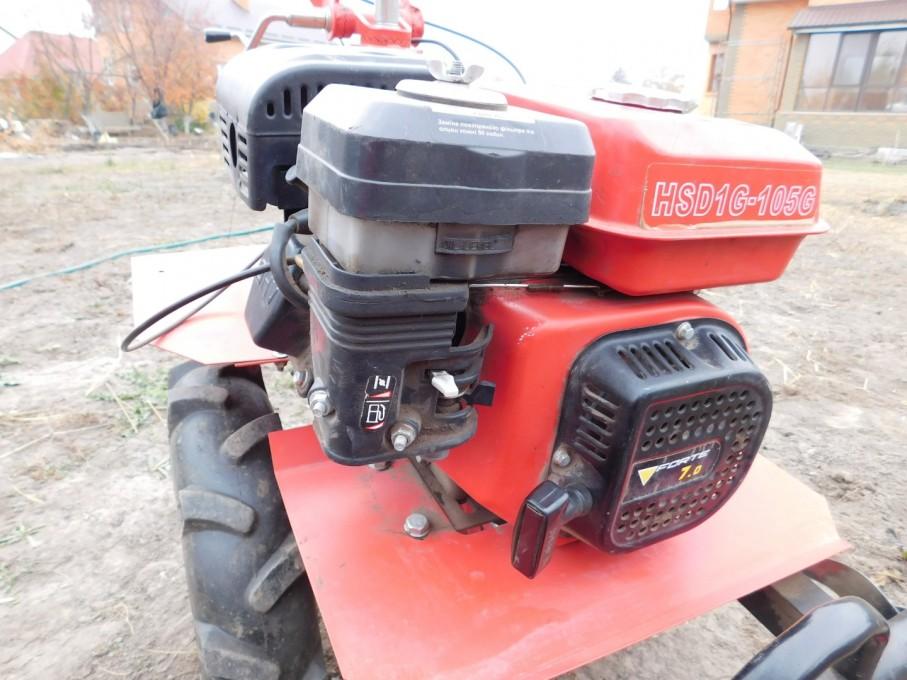
The motoblock is ready for start-up. The fuel plan is open, the air damper is closed. Then for the "shmorhalka" lightly until the beginning of the effort, and then strongly and sharply. As a rule, it starts from the first time. You can't imagine my shock at the first start after the purchase (because before that I had a not very good experience with a brushcutter and a chainsaw), - it started the first time, with uniform work! After a slight warm-up, open the air damper completely. On a hot motoblock, you can start without closing the throttle. But it will get there quite quickly, especially in the cold season, so closing-starting-opening the infection will not hurt, but will save nerves and prolong the life of the rope of the windbreaker.
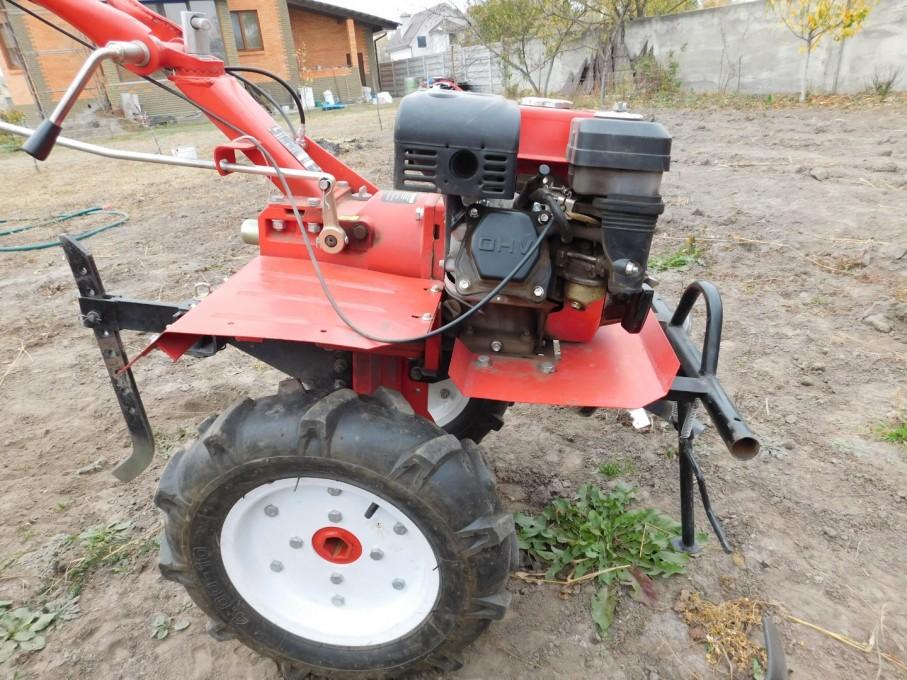
View of the right (in progress) side. This is where the muffler comes out. I must say that the exhaust is surprisingly clean. But when starting, you stand on this side, so the enriched exhaust goes towards you. Well, it is clear that at the same time the clothes should be working. You can also see the gearbox lever from this angle: forward 1st gear (more lively), back 2nd (mostly I carry out all operations on it, more economical fuel consumption and easier on the hands).
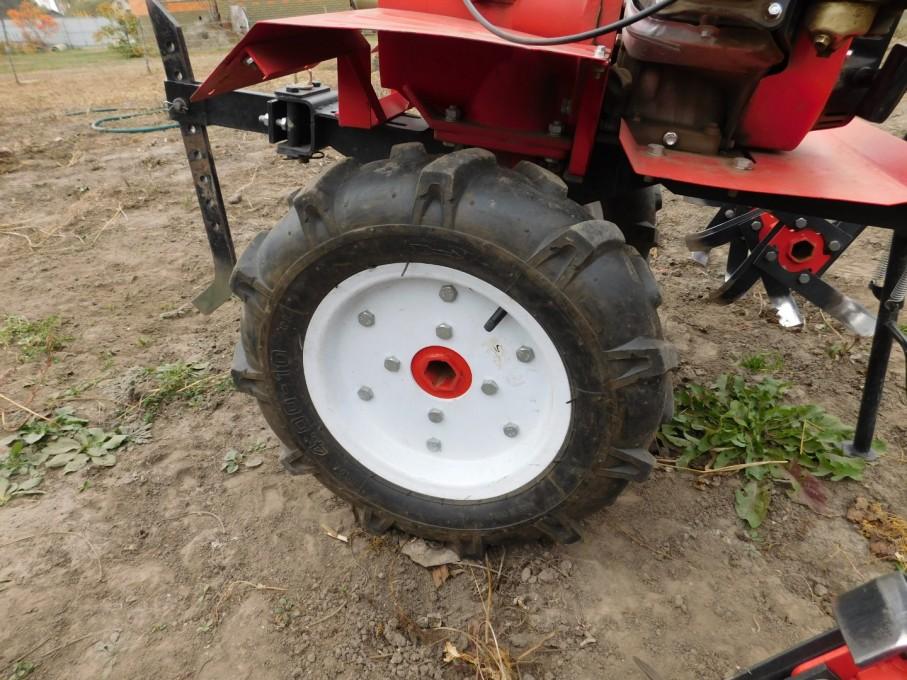
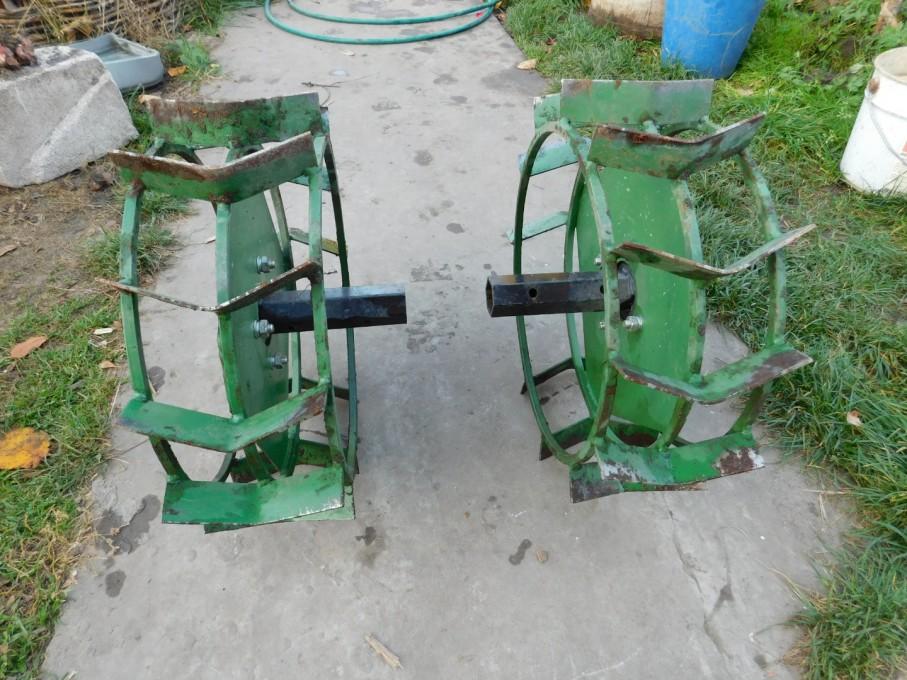
Wheels. Rubber with tractor tread. I deliberately took 10", because there were also 8" to choose from. And I didn't miss a beat.
Given that the walk-behind tractor was in the factory transport box, without pre-sale rolling, the wheels had to be assembled, since the wheels are made of 2 halves, ALL the hardware!!!! AND TO ALL!!! were even with a reserve!!! And all possible keys for them! Also of good quality!
The rubber with the camera must be placed between the discs and then twisted. When there is a problem with a hole in the wheel, we have to disassemble the wheel.
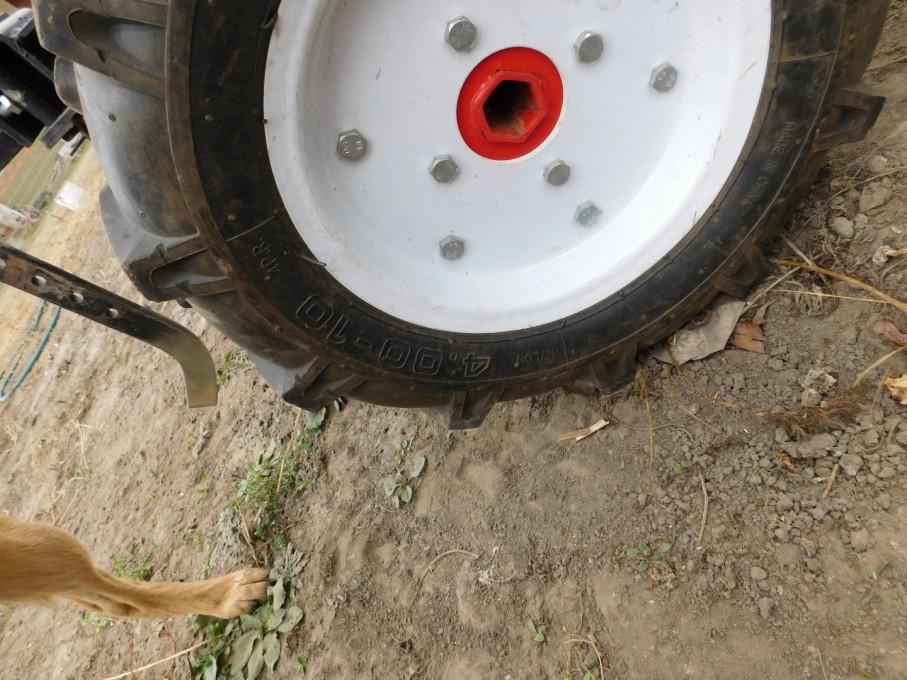
Another type of disk twist. An interesting point - rubber under a pressure of 3.3 atmospheres. Tractor house. "Yawned" on it once and ended up with a severed camera nipple, which, as it turned out, is not cheap.
I apologize for the dog's paw in the frame, the walk-behind tractor is its weakness, especially when it is started and in motion.
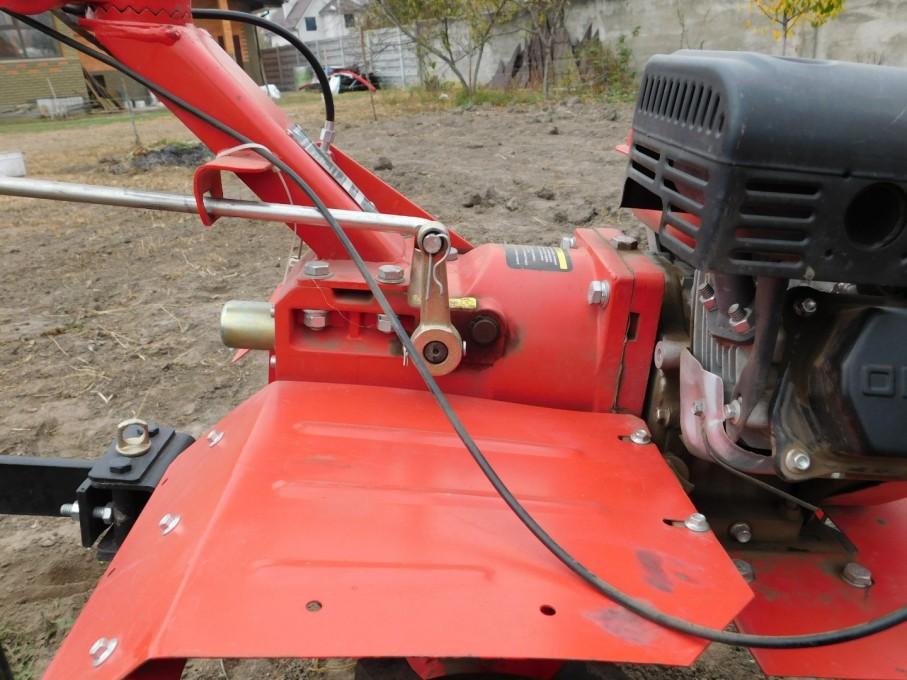
The location of the gear selector lever. If necessary, it can be easily dismantled, for example for transportation by car, which I have done many times. And yes, do not throw away the stand from the corner from the transport box-packaging and do not cut the corner (even if it is absolutely necessary!). It will come in very handy for such transportation, when you need to remove the wheels due to their dimensions. I do this when transporting a combi by a car! It's true that it's difficult to load/unload - still a good 100 kg (and even more on the tag)
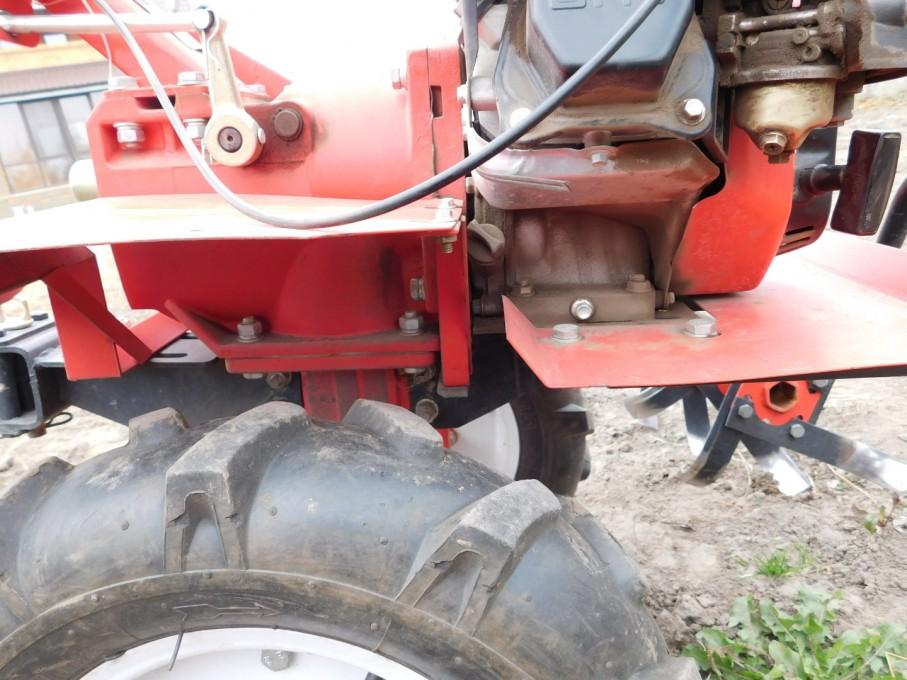
Frame (black from below), attachment point of the engine with the box and transmission of the transmission to the box from below. Very high maintainability! Although, I hope, I will not get to know this in practice soon.
And on this side, the waste oil drain nozzle (gray plug for finger grip under the cylinder protective jacket on the lower left)
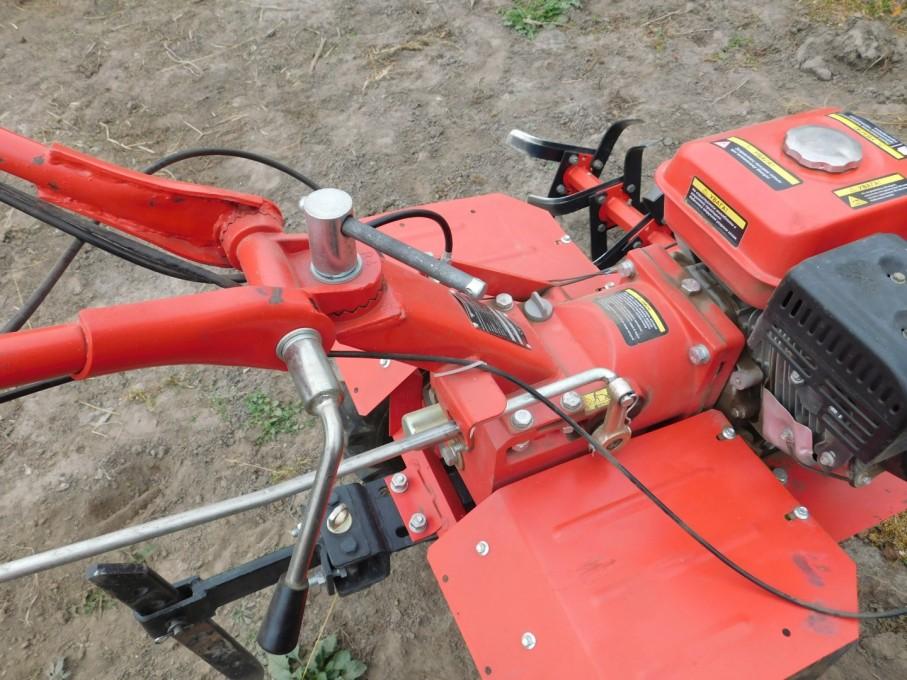
View from above. Pay attention to the number of stickers with instructions and warnings. For 7 years of operation, not a single one has come off! Here is "China" for you! The control handles can be adjusted in the horizontal and vertical planes, for maximum convenience or, for example, to walk sideways and not trample the processed (never used this in practice, although I tried).
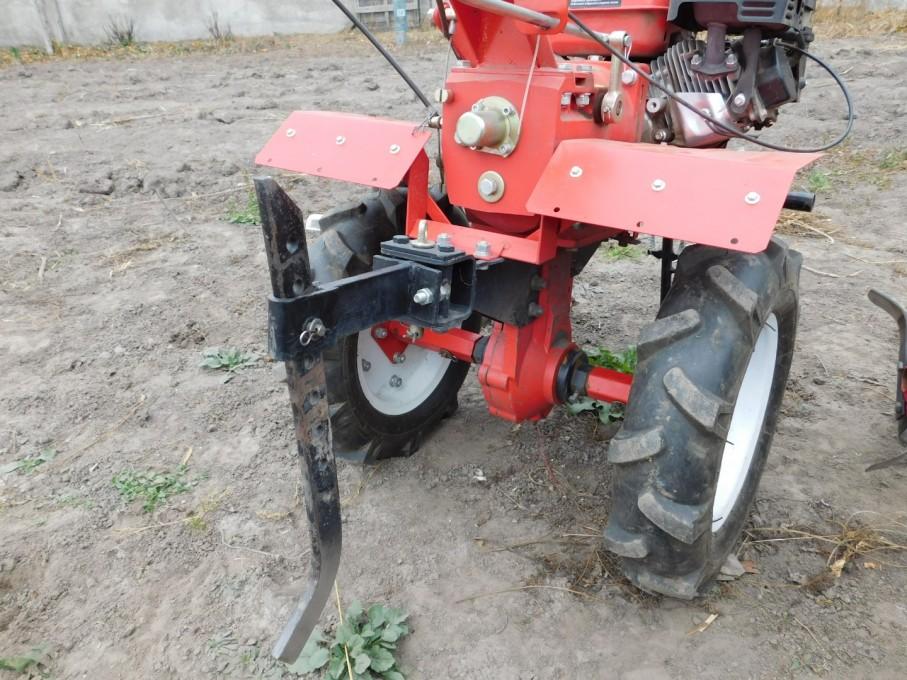
View from the back. There is a power take-off shaft (covered by a protective cup on screws). I don't have a tool for it, so I never unscrewed it.
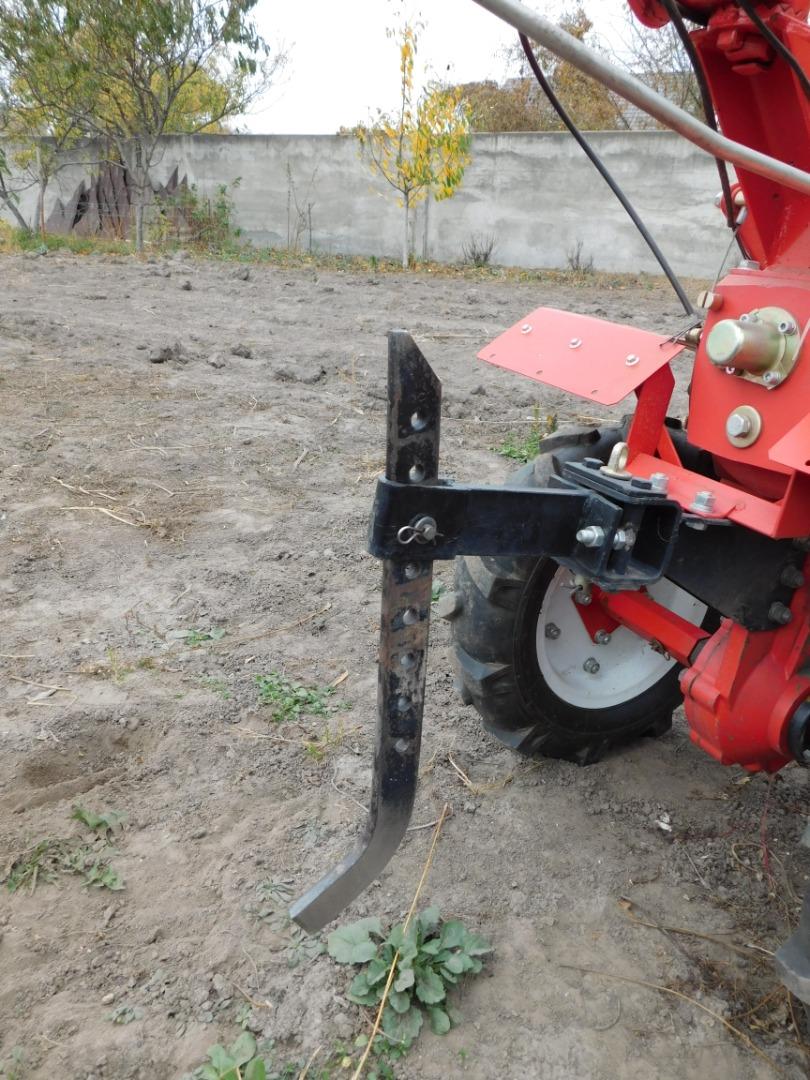
A very important working organ for:
- as a support when re-shoeing the wheel/mill;
- and if you are serious - it is a regulator of the depth of immersion of cutters during soil cultivation (ploughing, just like that, with cutters, and well, that plow).
Don't be too lazy to play with the depth level on unfamiliar (and familiar, moisture can be different!) soil. This will be a guarantee of the quality of processing.
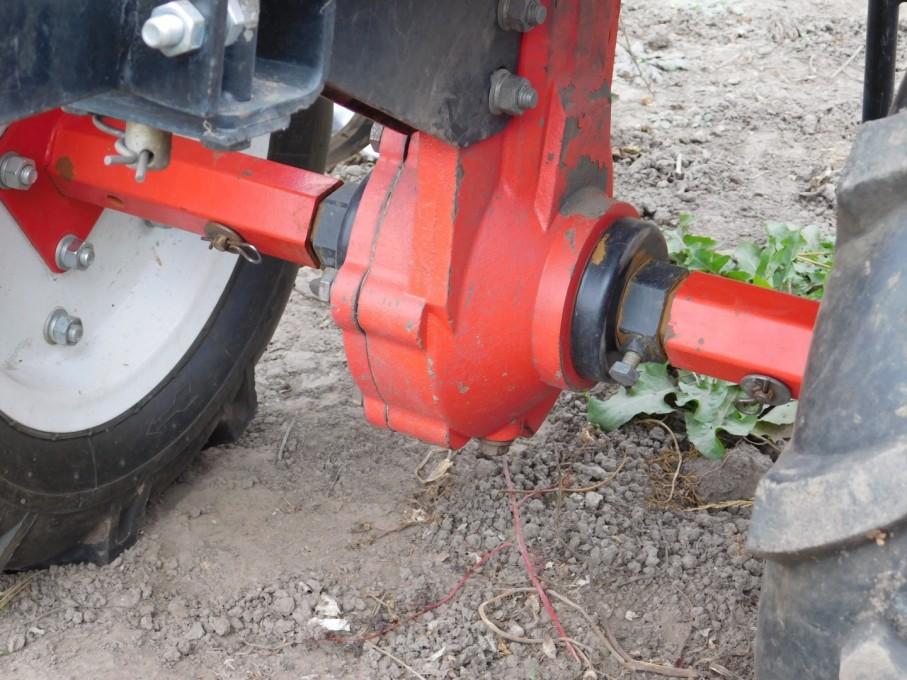
Fastening of the axle of the wheels in the transmission. Of course, there is no differential. It's a little bad that everything that gets on the bolts of the protective cups is screwed on. But not critical. For one thing, you can see how the wheel spins. It's funny - for so many years, I have never lost a cotter pin from an axle at work, but just like that - they lost it!
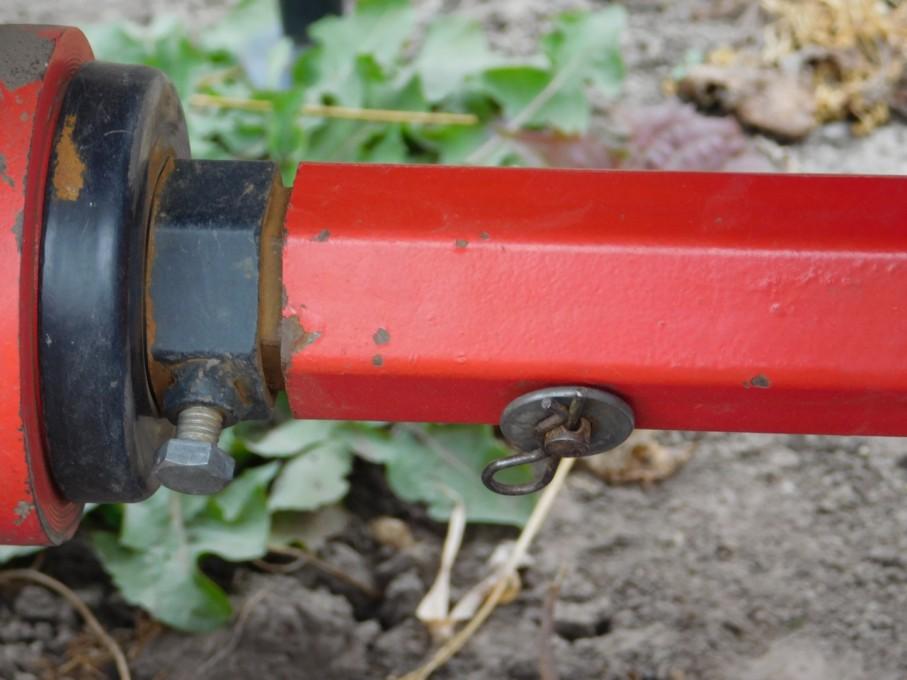
Here, this is a miracle of the engineering thought of fastening.
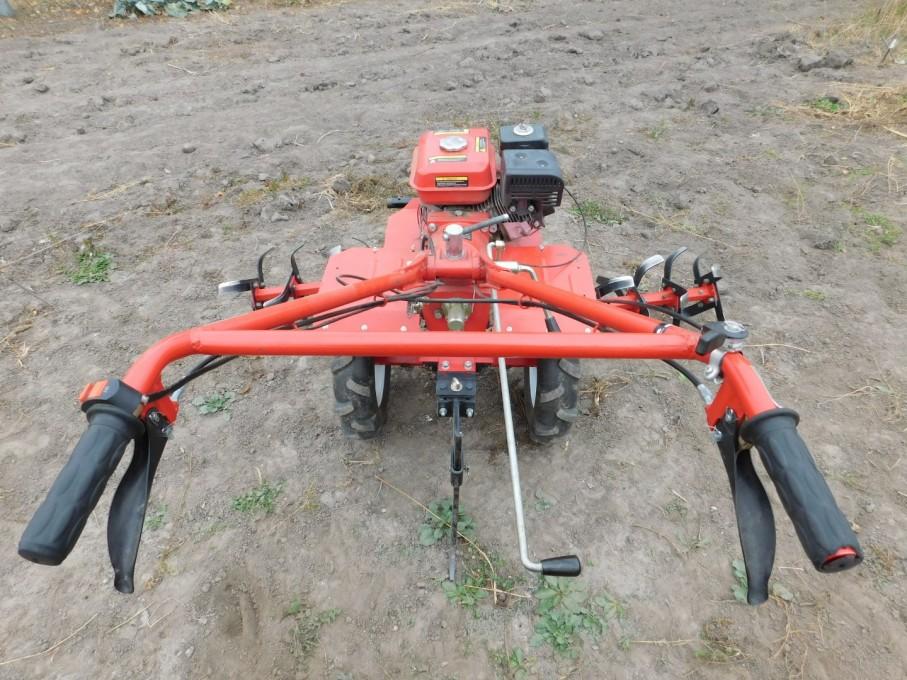
My workplace. And it looks cool in the photo. But this is not a toy. Although it is "average", 100 kg and 7 horses will not only do a good job, but also require your strength. So, after a day of work, you will sleep soundly!
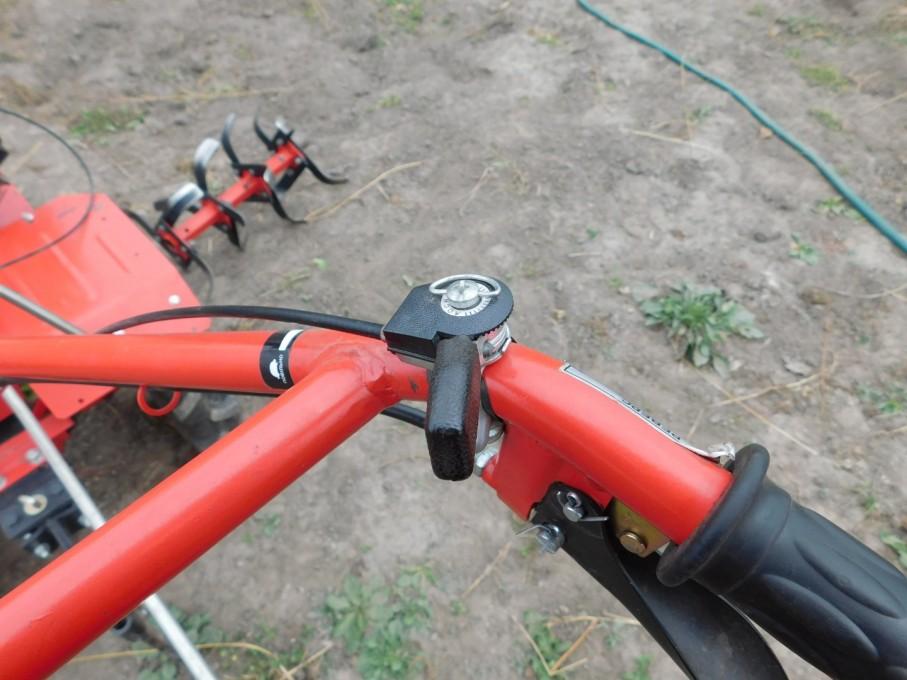
The "gas" is under the right hand, on the "ratchet" to fix the position. There are no problems with this. The cable was never adjusted, although it was checked, only the fasteners were tightened. Vibration though...
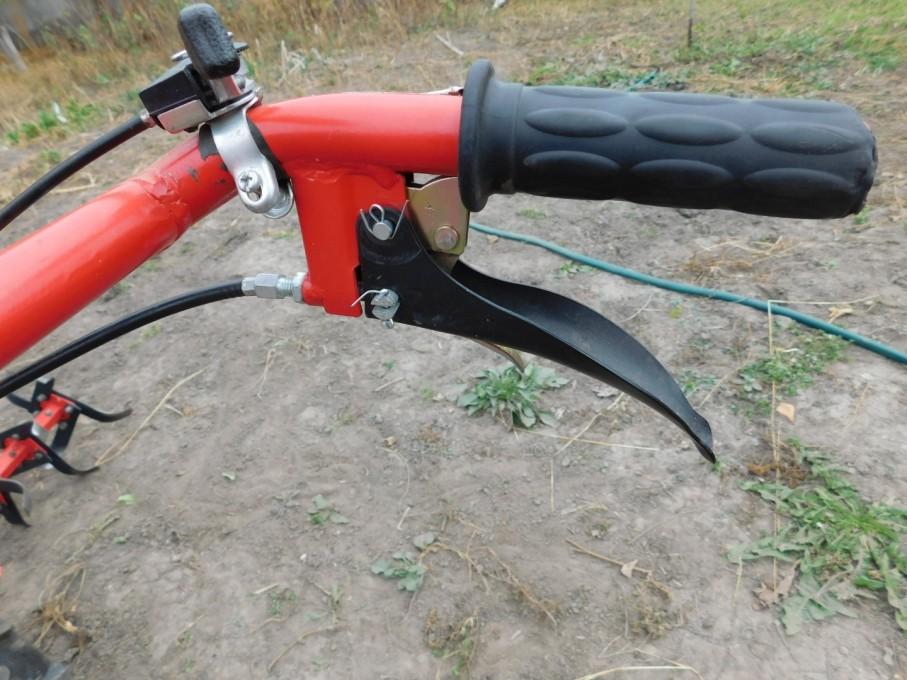
On the right hand... yes, the back way. The dog on the handle prevents accidental activation. Pay attention to the splicing of the switch axes - immediately bend the antennae so as not to injure your hand. Because there was such...
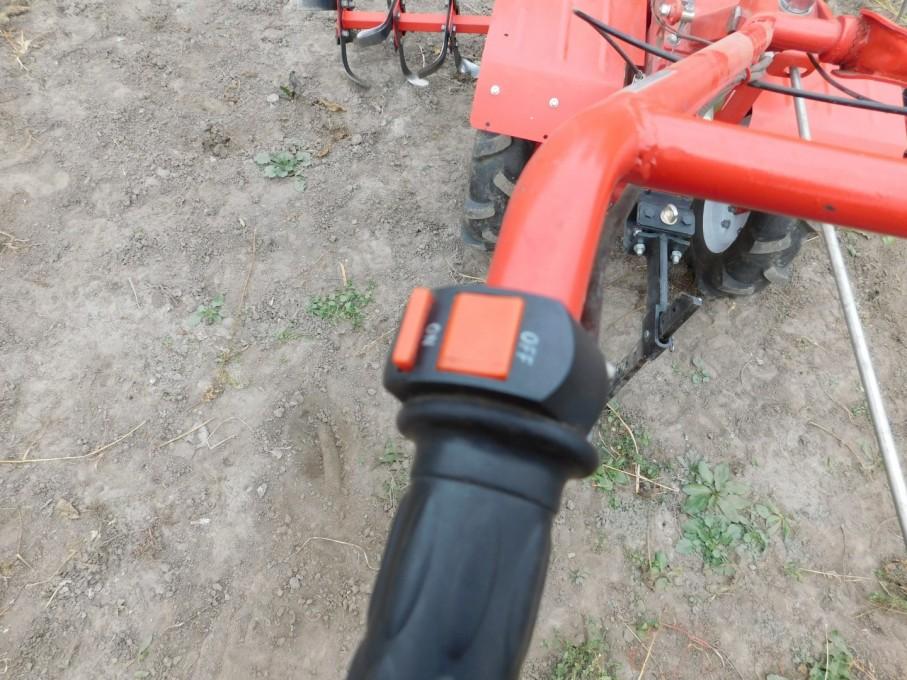
And this is the ignition switch. So far trouble free. But you can accidentally mute it at work.
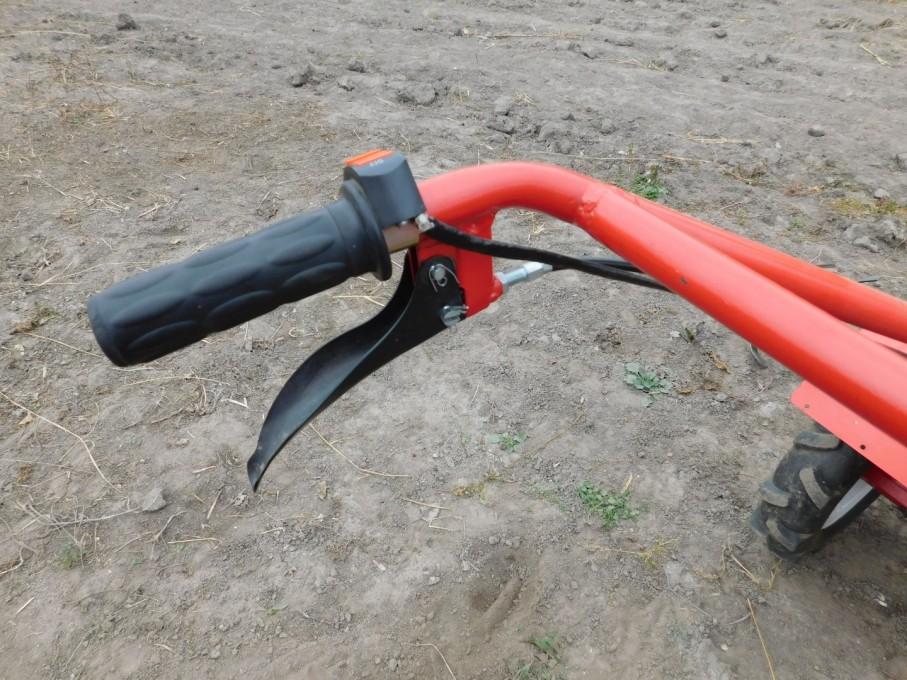
And this is a type of vaccination. Tight, but with correct work. The ergonomics with the handle and the injection lever are very comfortable (at least for my hand). The clutch cable is adjustable, but there is no need to adjust it out of the box at this time.
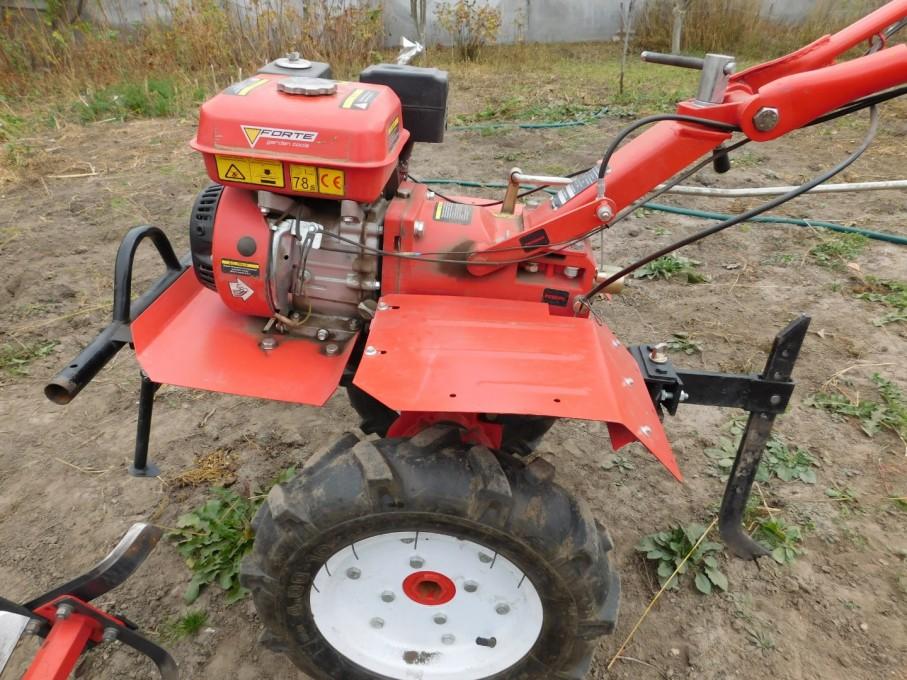
General view on the left. There is nothing special here, except for the engine oil filler neck (0.5 l, I use the same as for the car, 10W-40, the remaining replacement is just enough for the walk-behind tractor, and it is not needed often).
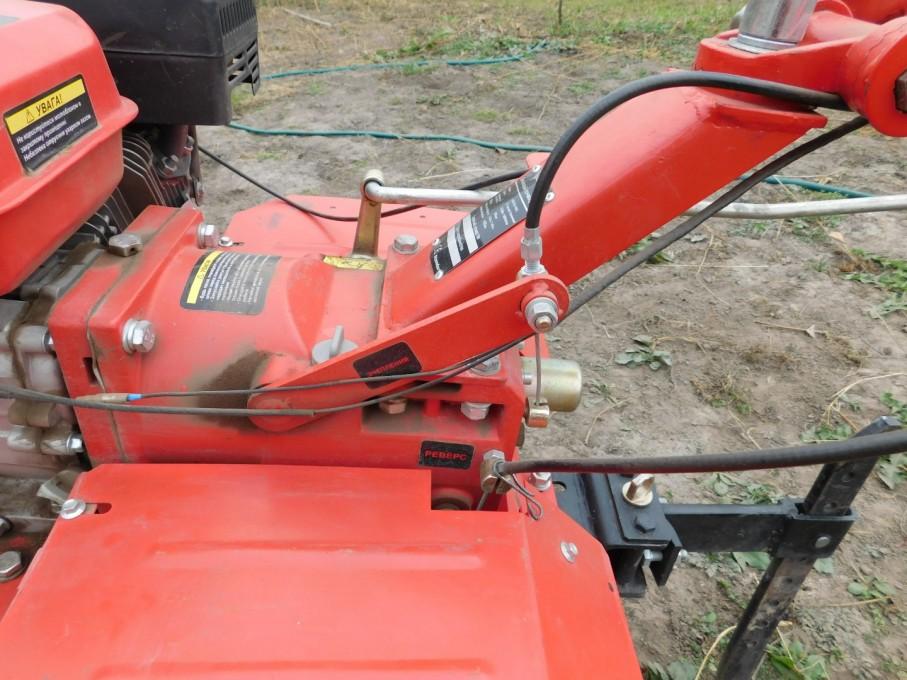
View of the box on the left. Injection lever. The stuffing box "snorts" a little, but it's not critical.
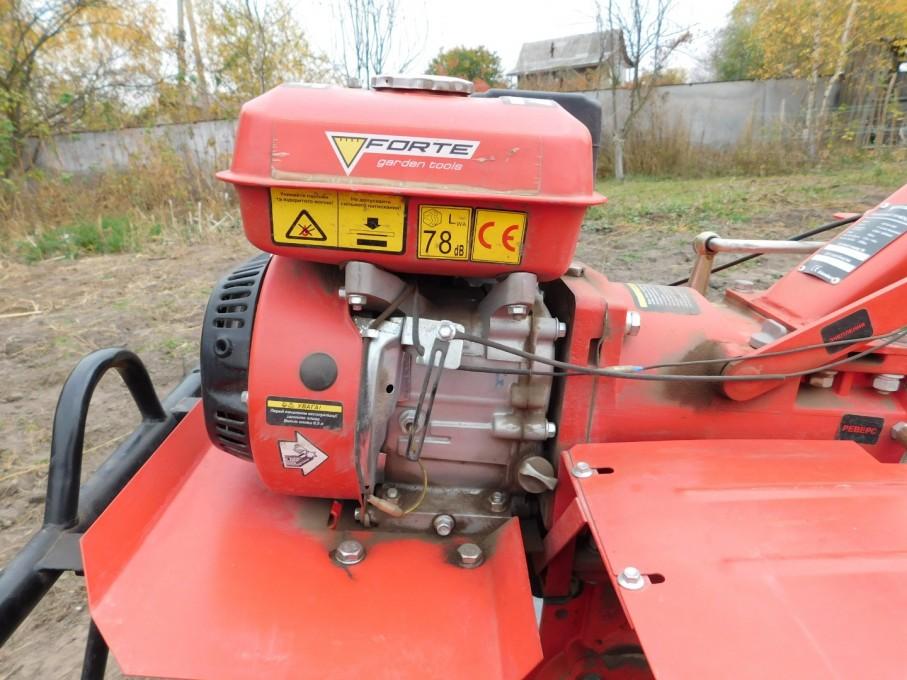
A view of the engine and a larger view of the oil nozzle.
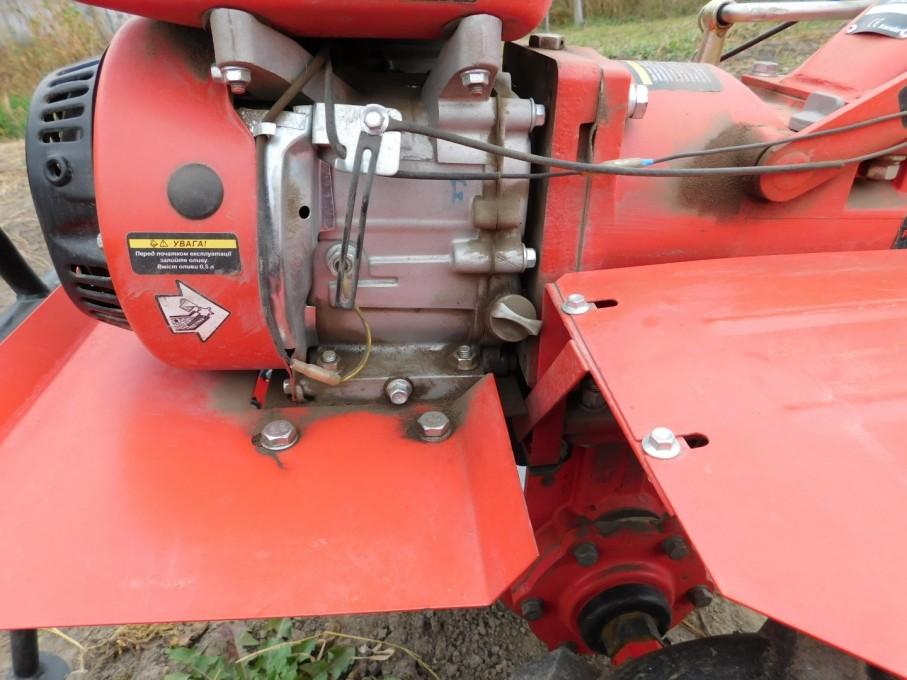
An even larger one...
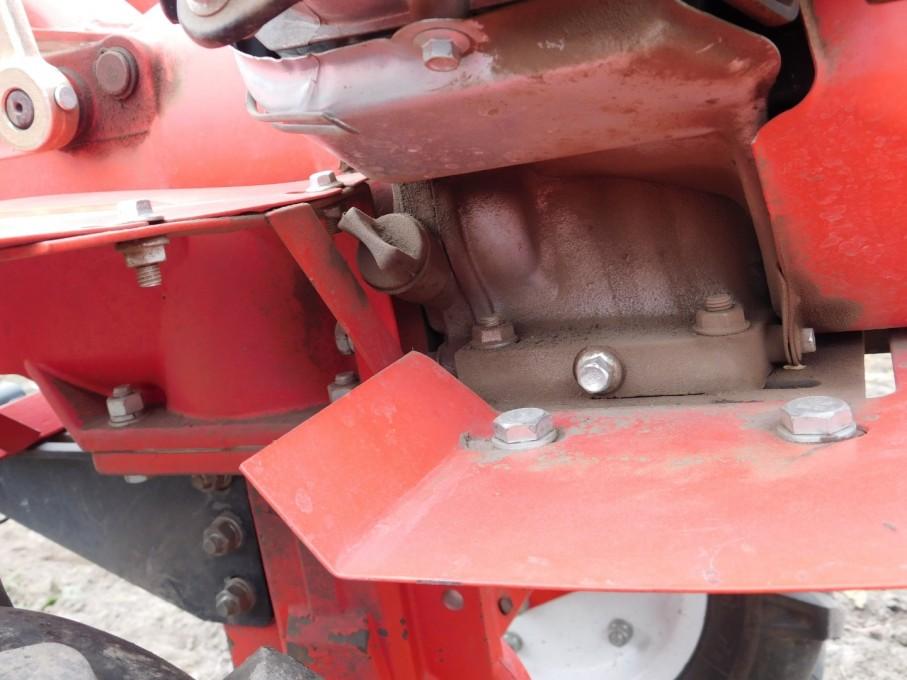
Close-up of the waste oil drain nozzle.
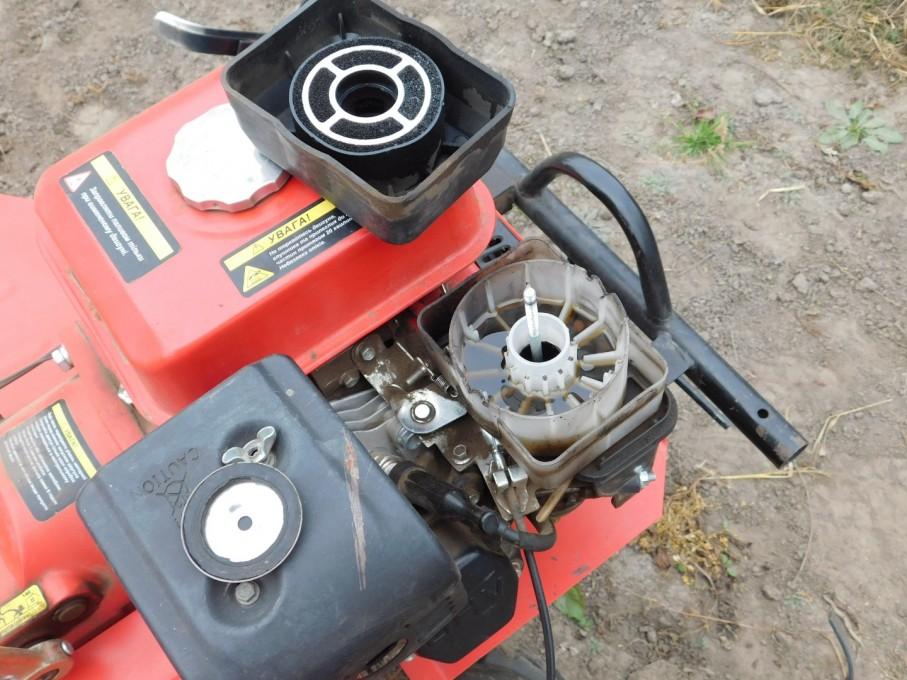
I was not too lazy to remove the air filter. The oil in the bathtub is already dirty. It will be necessary to replace it after work. Take care of the filter, it's a guarantee:
- economical consumption of fuel and your nerves (and it was... deaf...);
- long service piston group (well, criticize);
- easy "start-up" and correct operation.
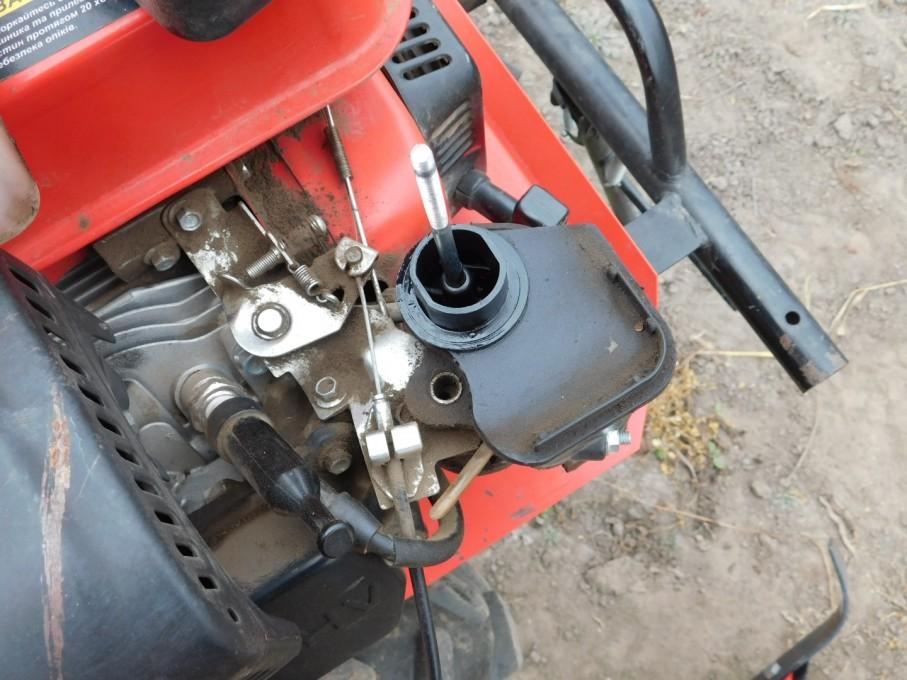
Here is the air filter dismantled. At the same time, he left, washed the "mochala" with gasoline. And, of course, dried.
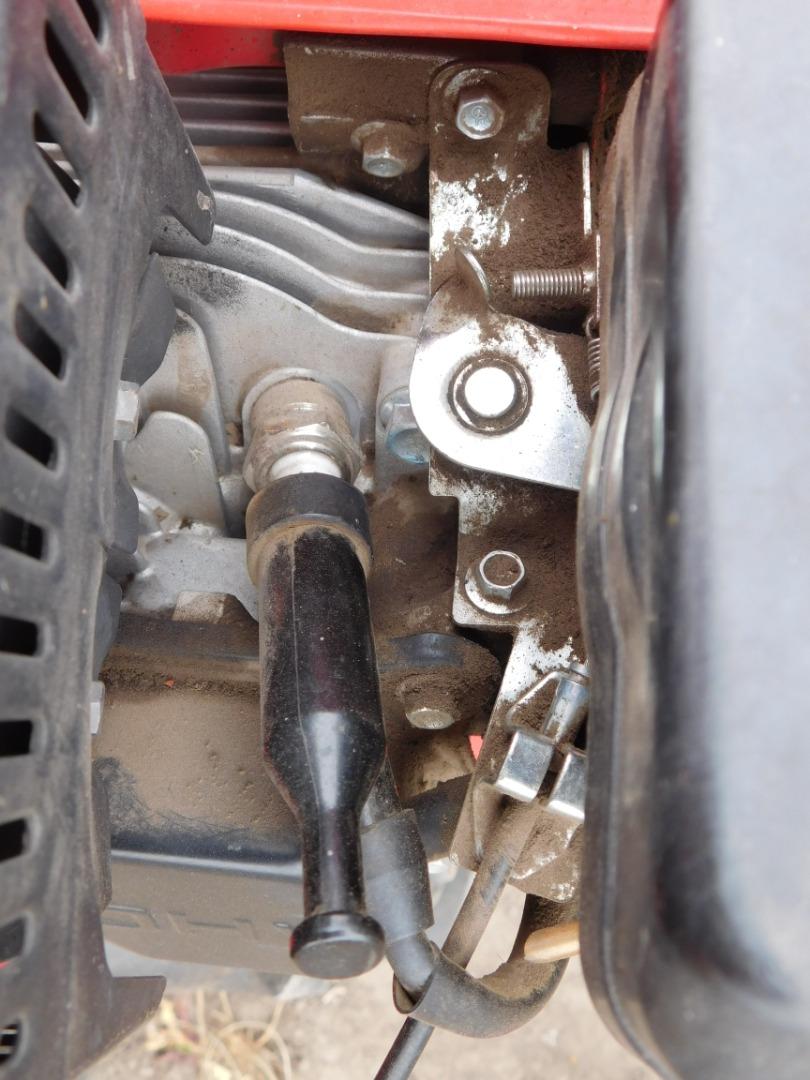
A candle (still factory!!!) with a candle holder. Takes off tight. And there is pollen. But it does not affect the "speed" at the moment.
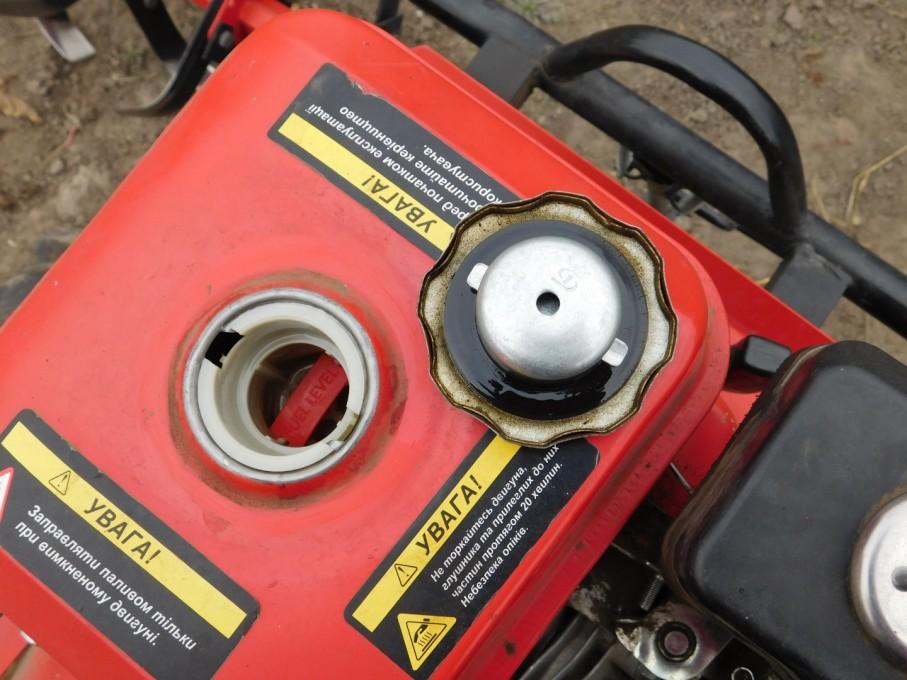
The neck of the tank with a cork. The red division on the filter mesh in the neck is the maximum fuel level.
About fuel: as I mentioned, I use 95 euro gasoline (Belarusian, if they don't lie at the gas station).
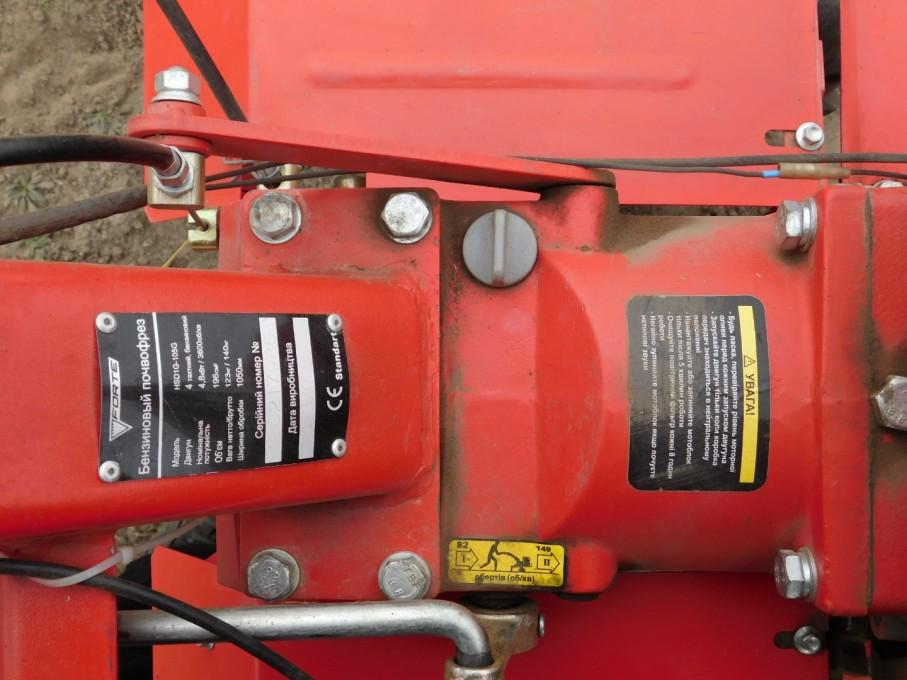
A tag of the walk-behind tractor with data and serial number on the support of the operator's handle. On top of the box, there is a filler neck with transmission oil (currently 2 liters of TAD-17 are hanging around). Drain (it was somewhere in the photo) under the screw on the transmission near the axle of the wheels. The gearbox and transmission are lubricated simultaneously with this oil.
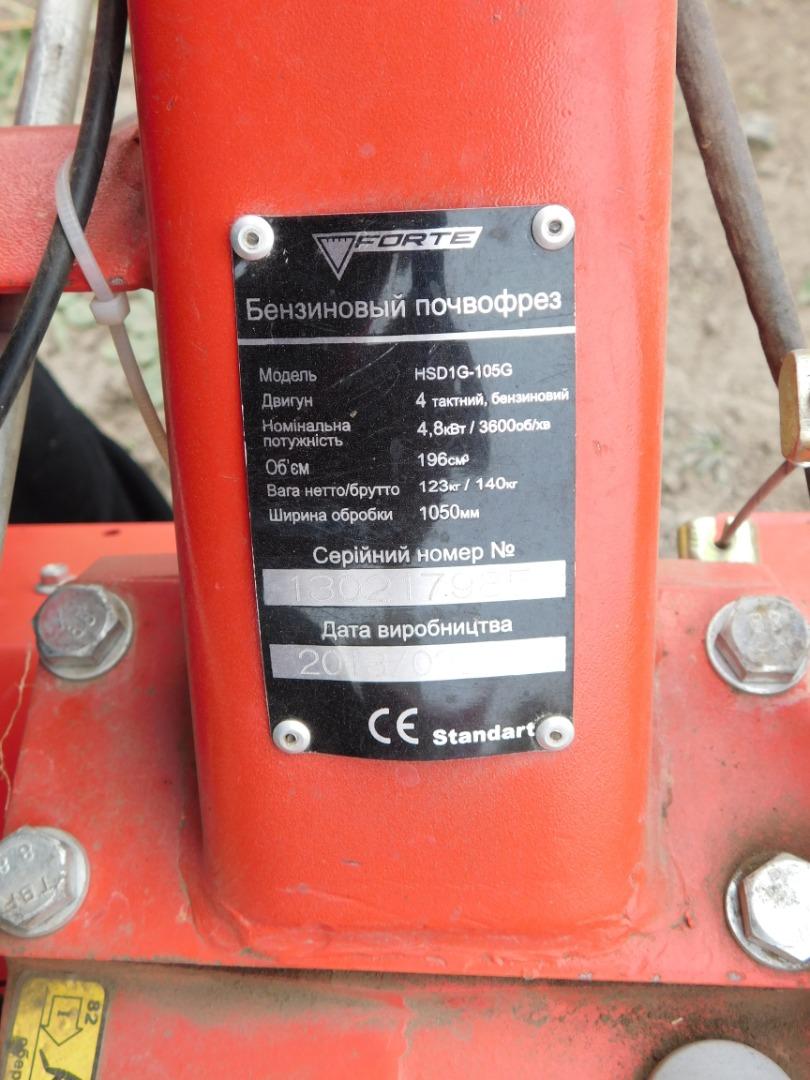
What's on the label.
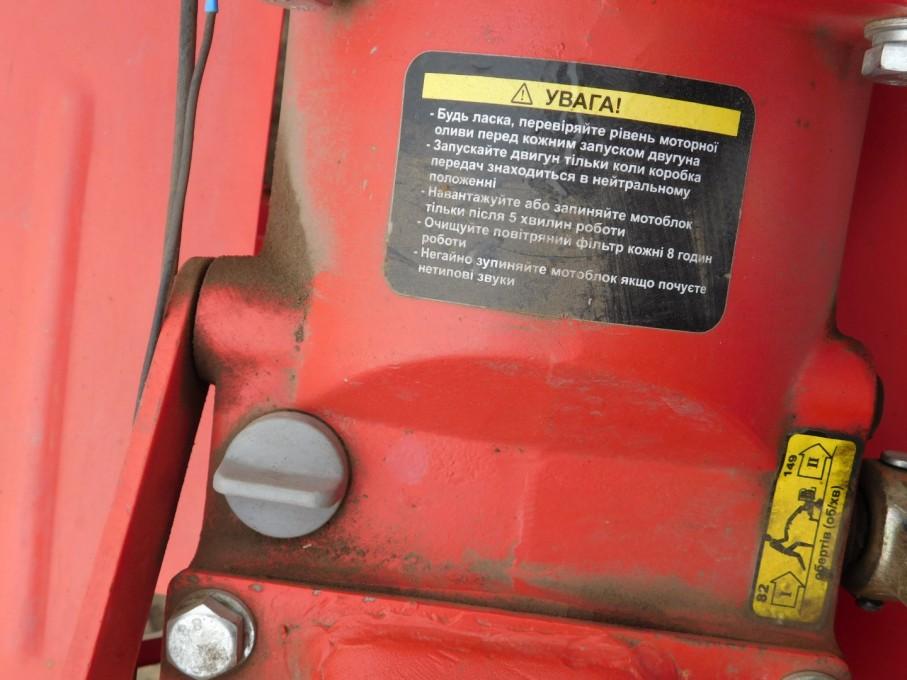
Important and useful instructions on the sticker for operation: short and clear.
Pay attention to the language quality of the stickers: I wonder where they were made and glued?
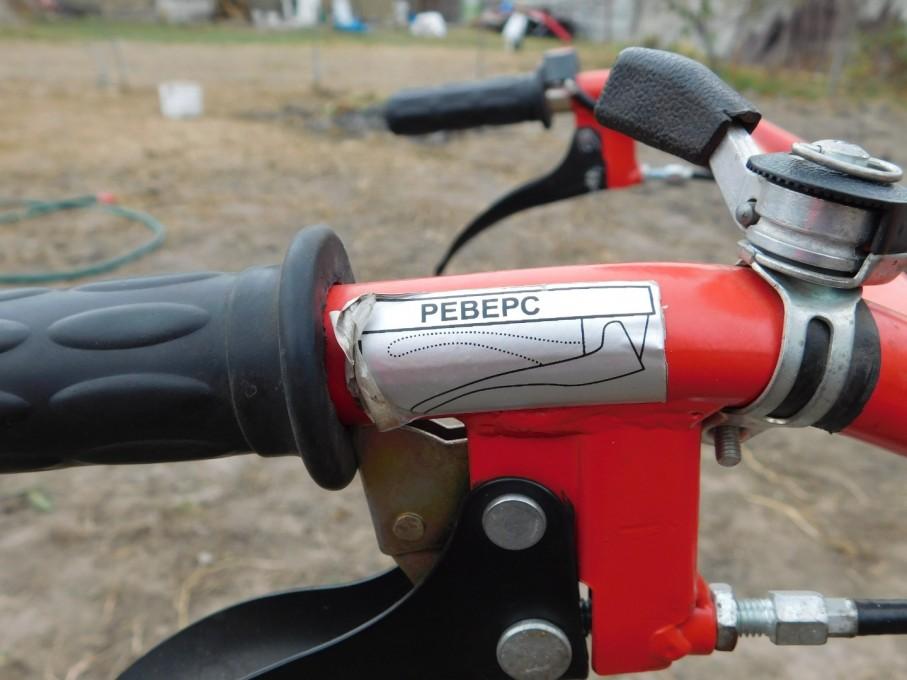
Unfortunately, the instruction sticker on the "back" is not so informative.

Removed the filler cap from the oil neck. Just the level.
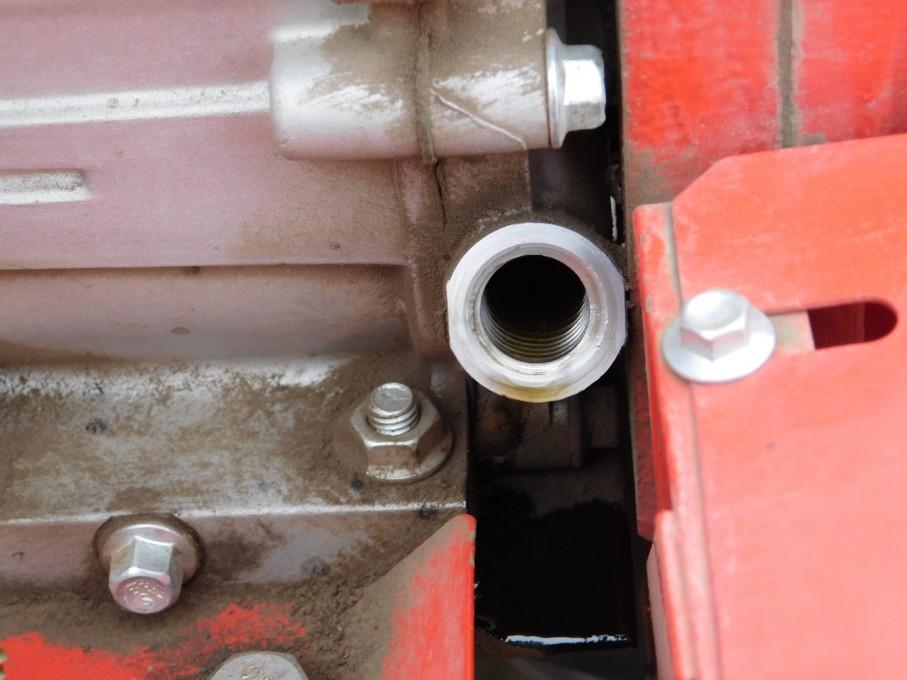
Look, by the thread. That's how it should be. I change the oil approximately every 30-40 hours of operation (not engine hours). In general, somewhere once a season. All the same, the walk-behind tractor is more expensive than oil.
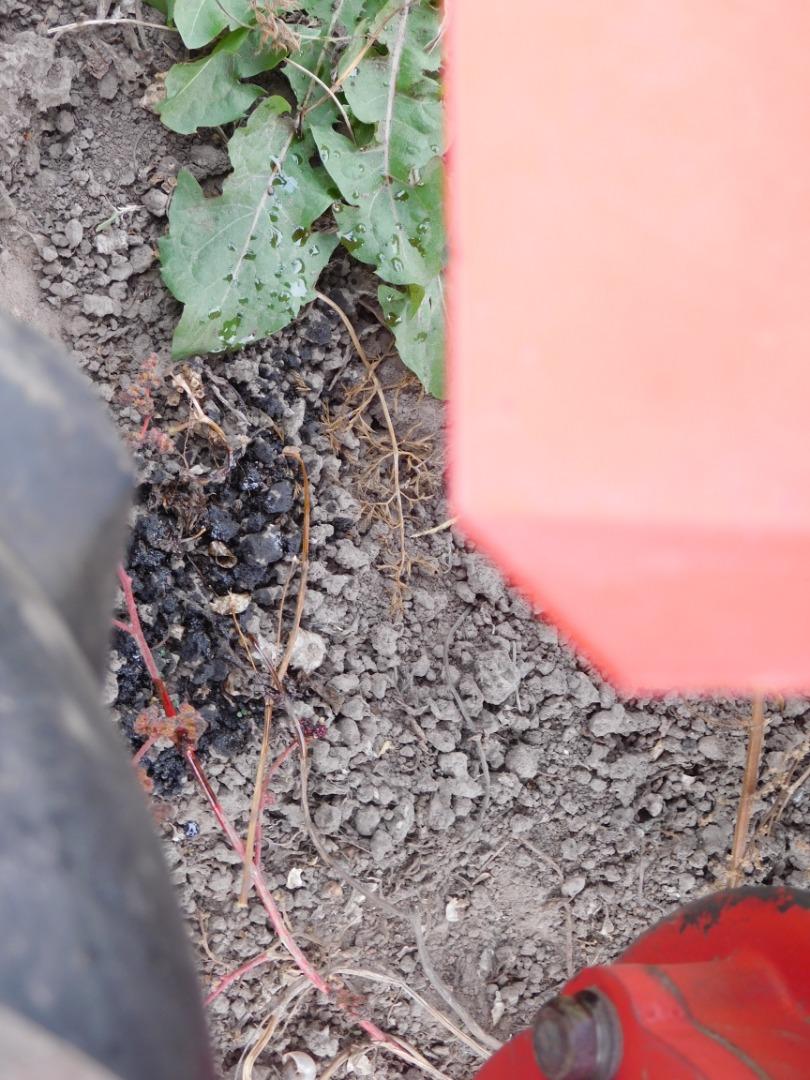
A bit of trouble - the walk-behind tractor was slightly tilted towards the fuel filler neck, so the oil spilled. To check the level and fill, try to put the walk-behind tractor evenly.
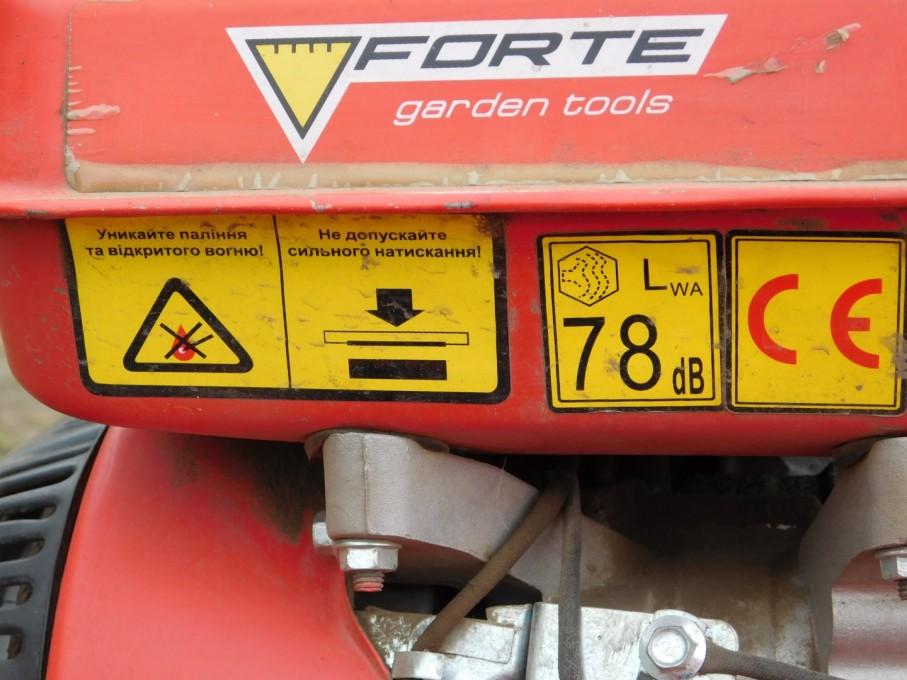
Safety-related warning stickers on the tank. Don't be lazy to familiarize yourself. Earplugs or protective headphones won't hurt either (I advise you, but I... although I don't, I take them to the mower).
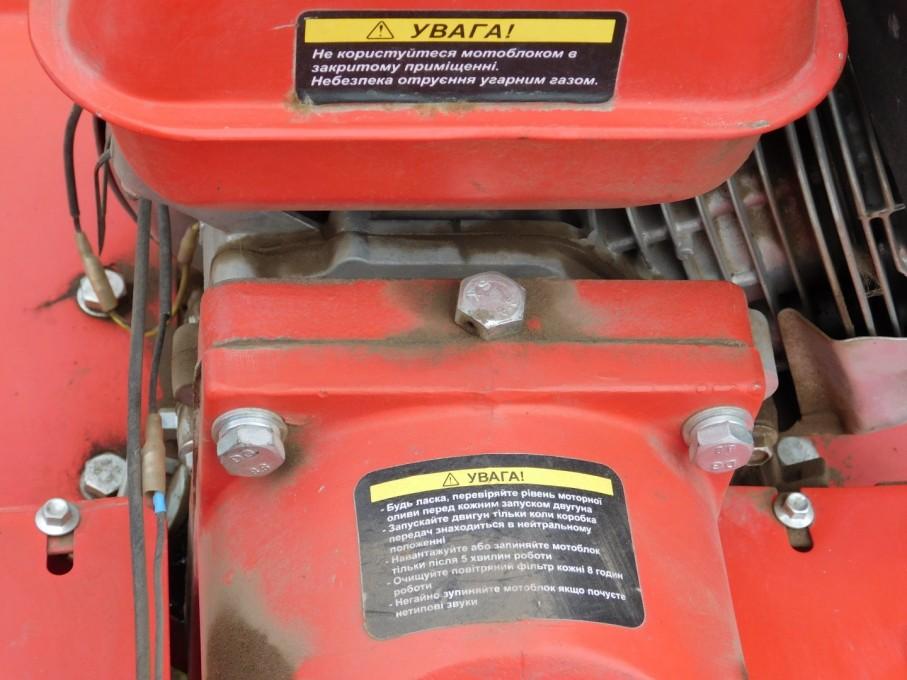
The engine gasket, boxes "snort" a little. But this is a working moment. Do not be lazy to periodically check the tightness of the threaded connections.
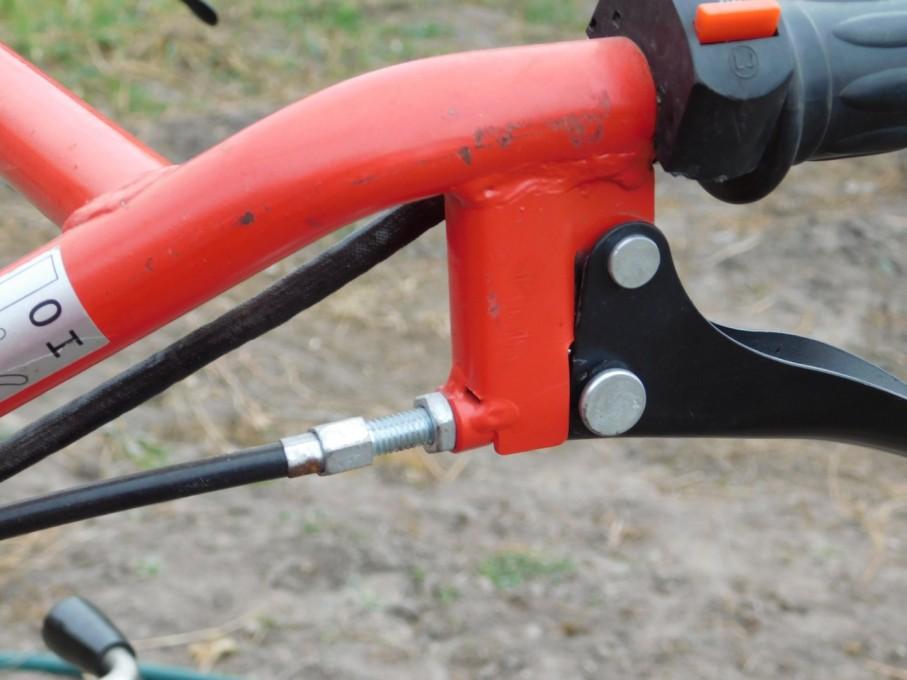
Adjusting the clutch.
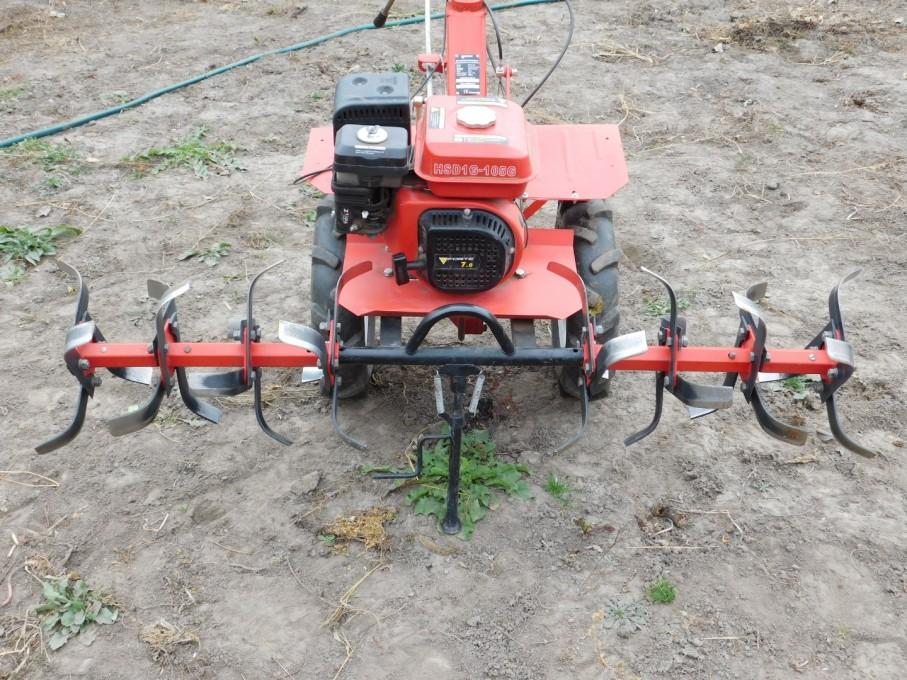
This is how you can transport milling cutters. And they are not light.
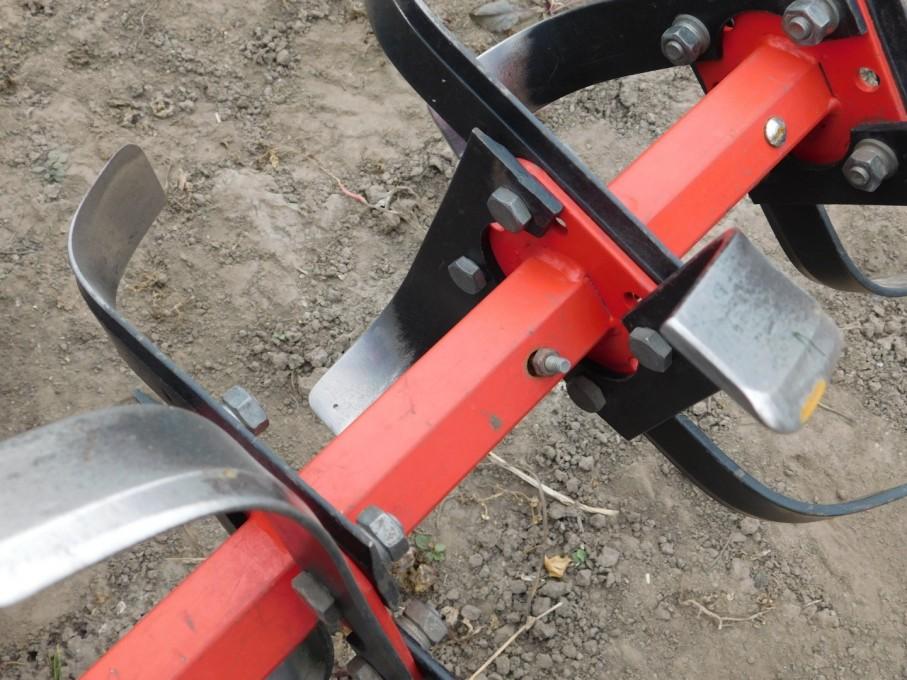
This is how working bodies are fixed. Honestly, at first I checked the puff, but then I realized the absurdity of it. Visually, everything is fine - well, fine.
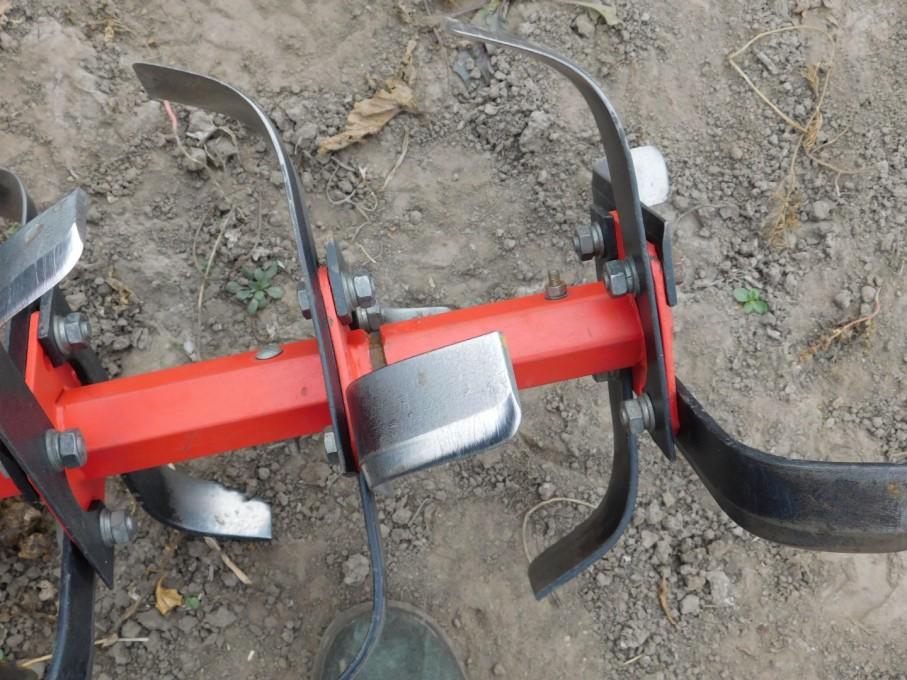
And the knives wear out little by little. And just like an anchor, they don't need to be sharpened.
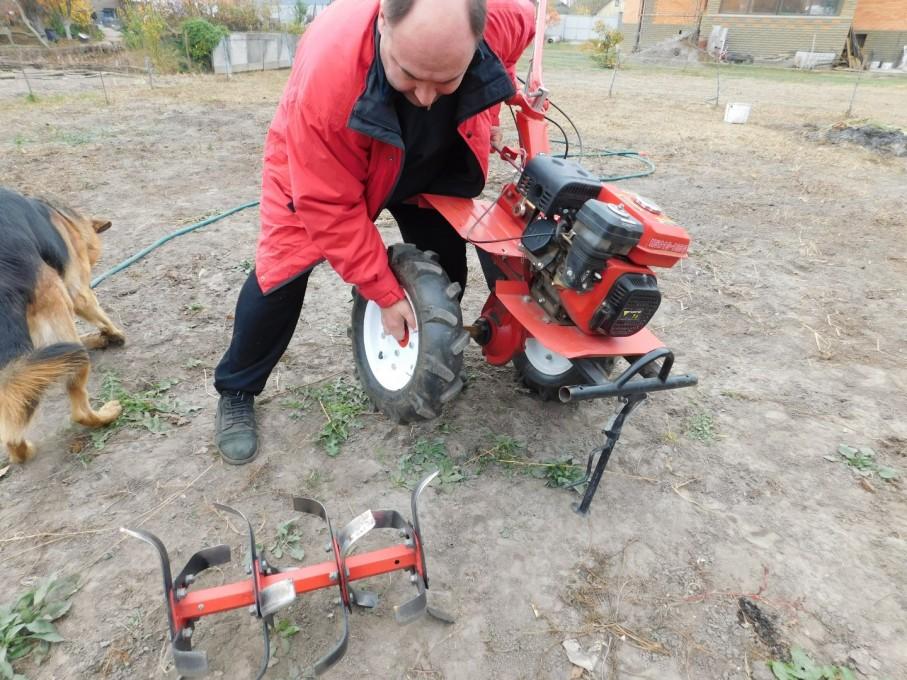
We're getting ready... I'm going to sleep myself. The first wheel is easy to replace, the second is more difficult - the cutter lever is larger. I posted the following specifically to show you how to do it the easiest on your own. Because it's only visually the walk-behind tractor is small, and after work it weighs three times...
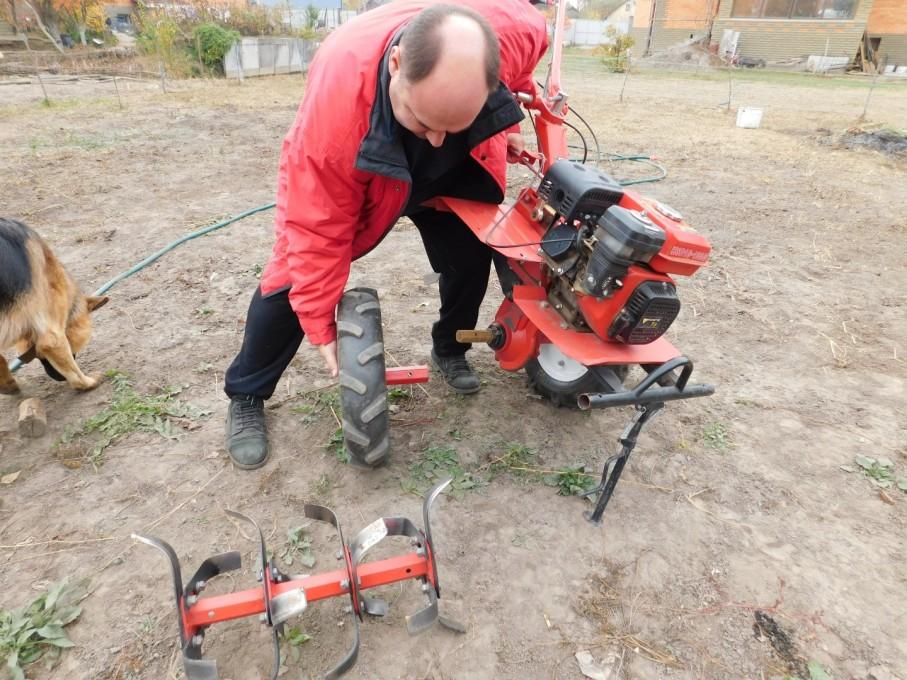
The wheel is removed.
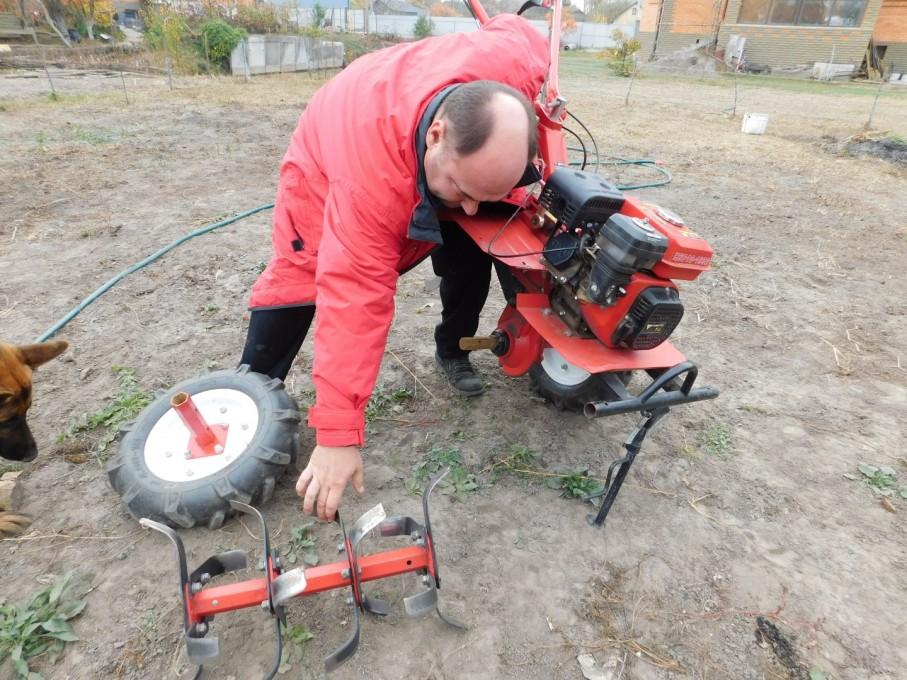
But I put the milling cutter far away...
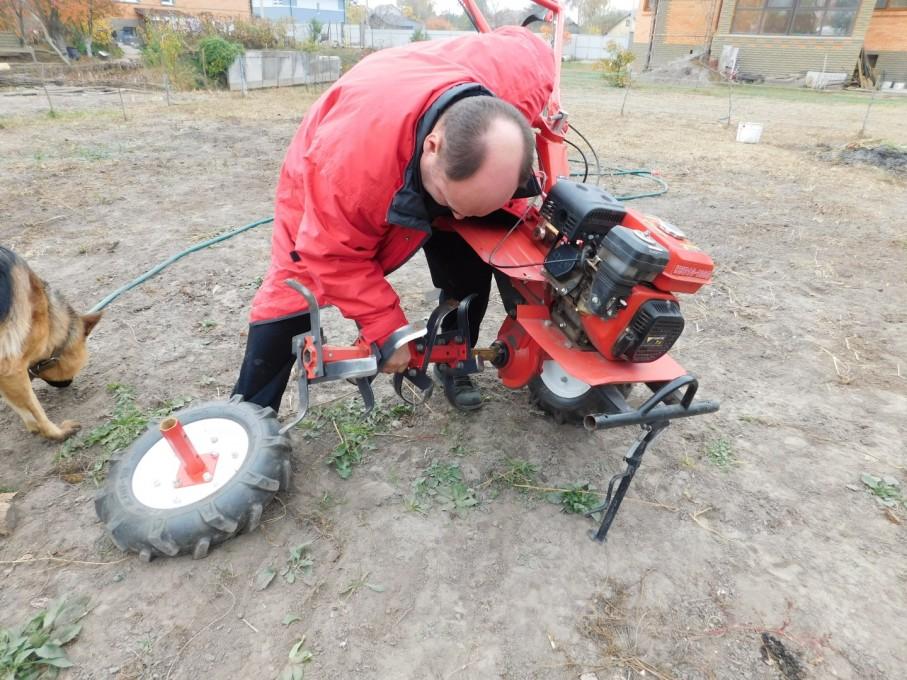
Be sure to align the holes of the cotter pin.
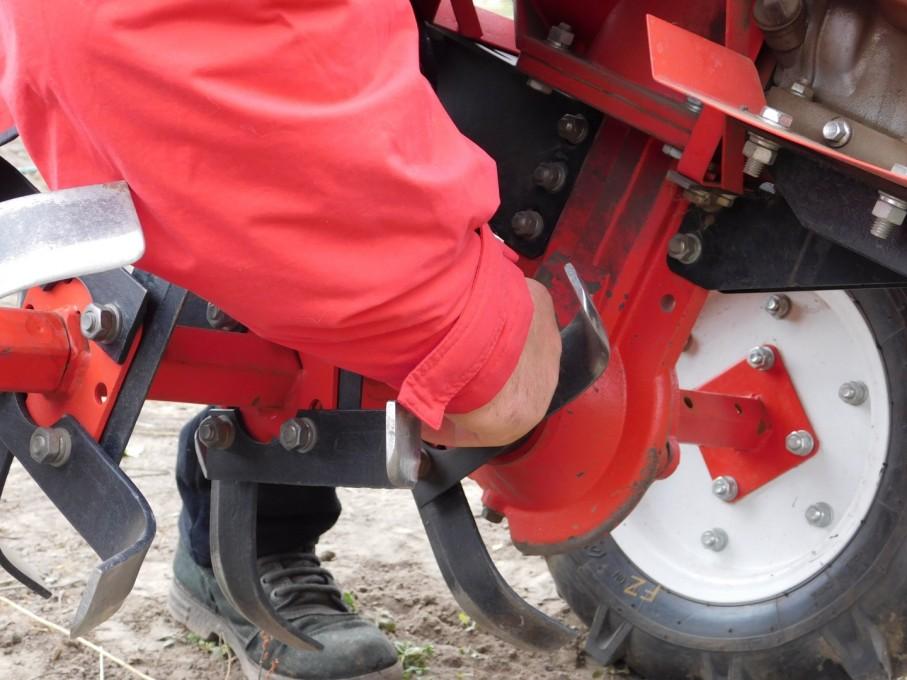
Splitting...
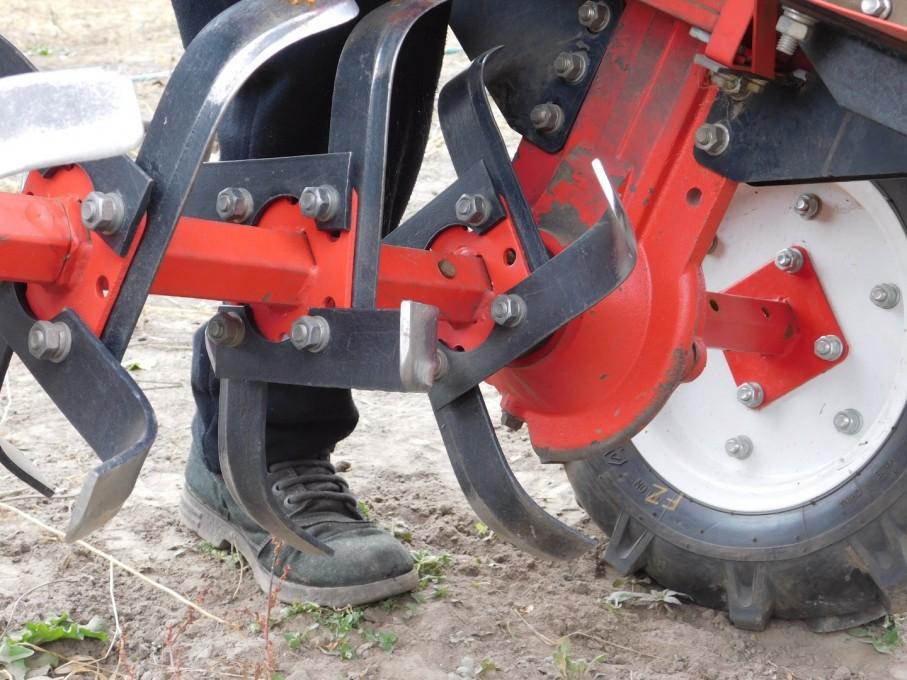
Done!
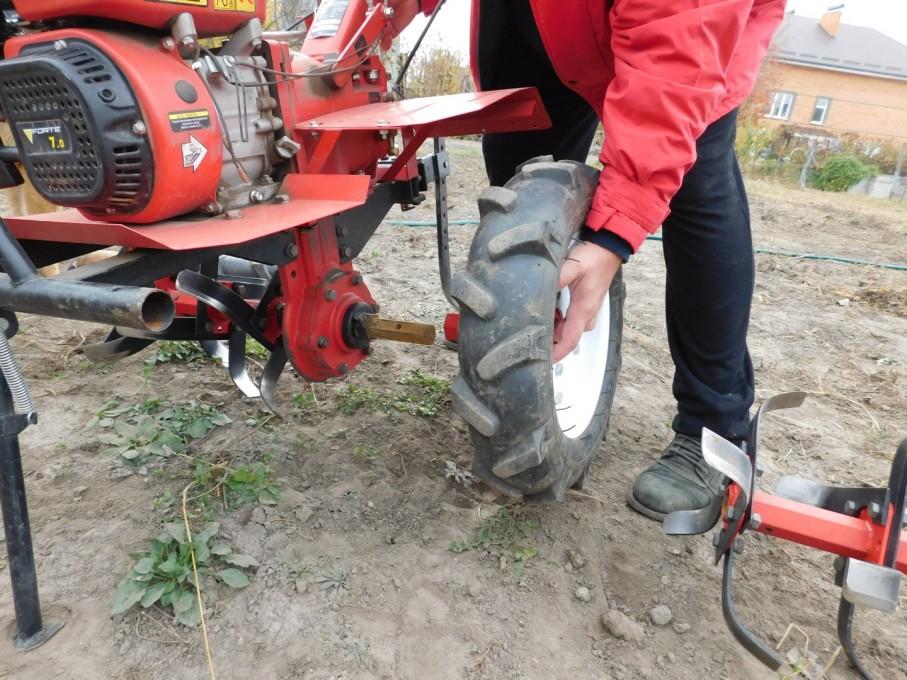
Similarly the other side.
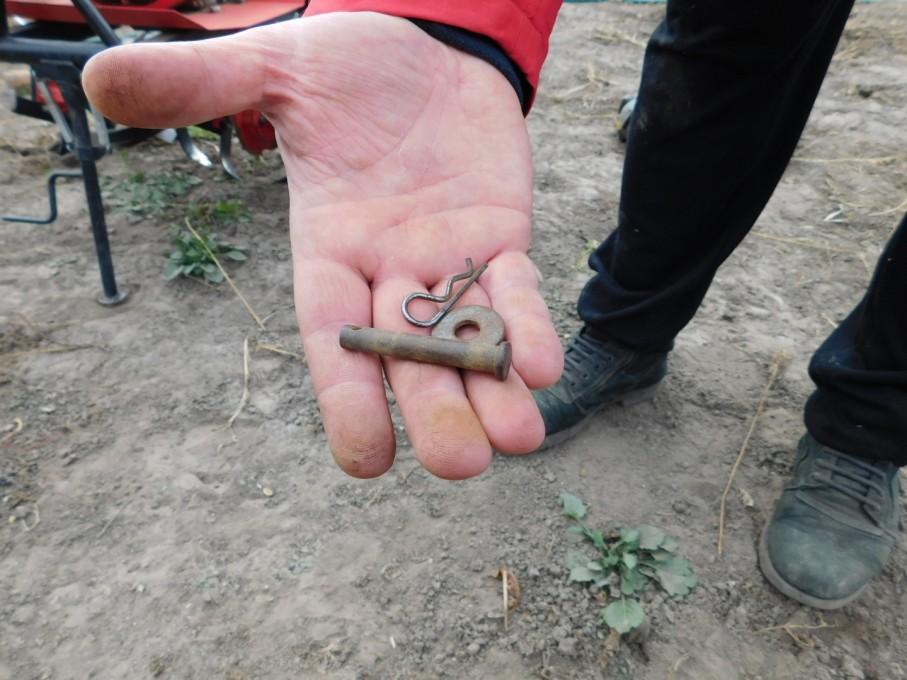
Splint. Keep at hand during the replacement process so you don't have to search for a long time.
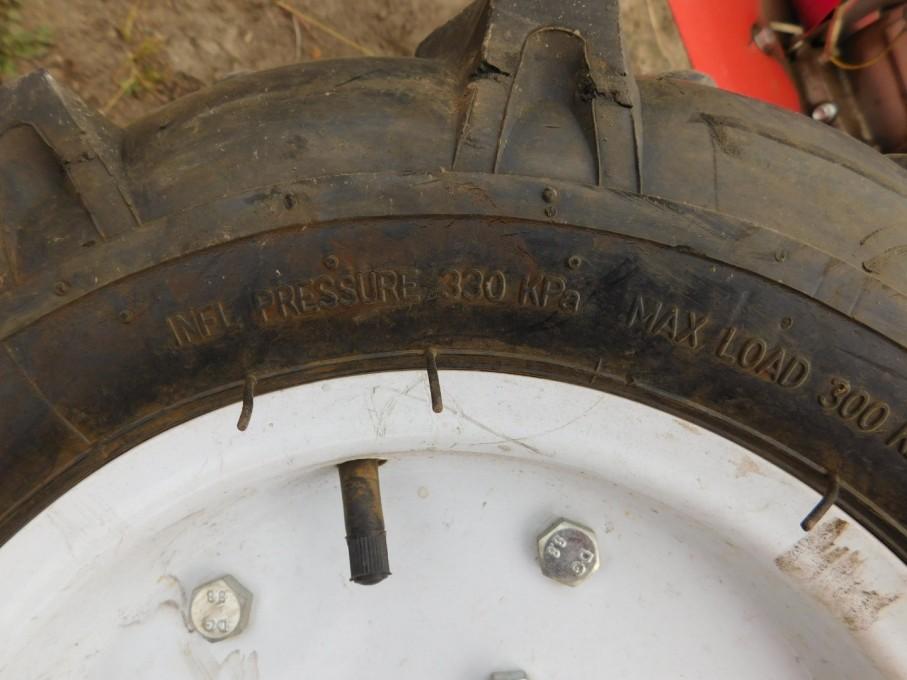
Pressure and maximum load stamp on the tire.
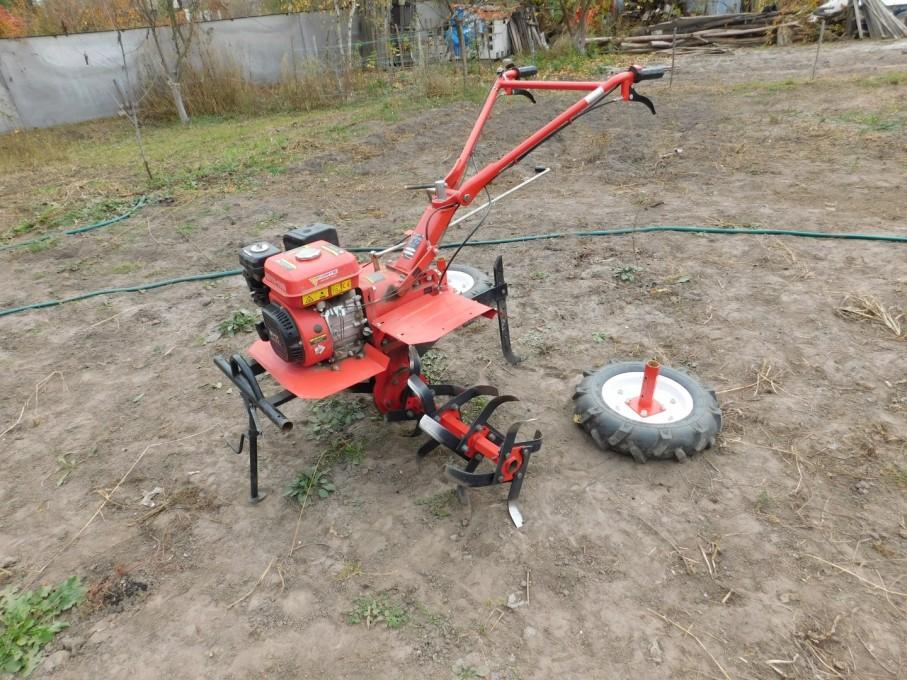
All ready to go.
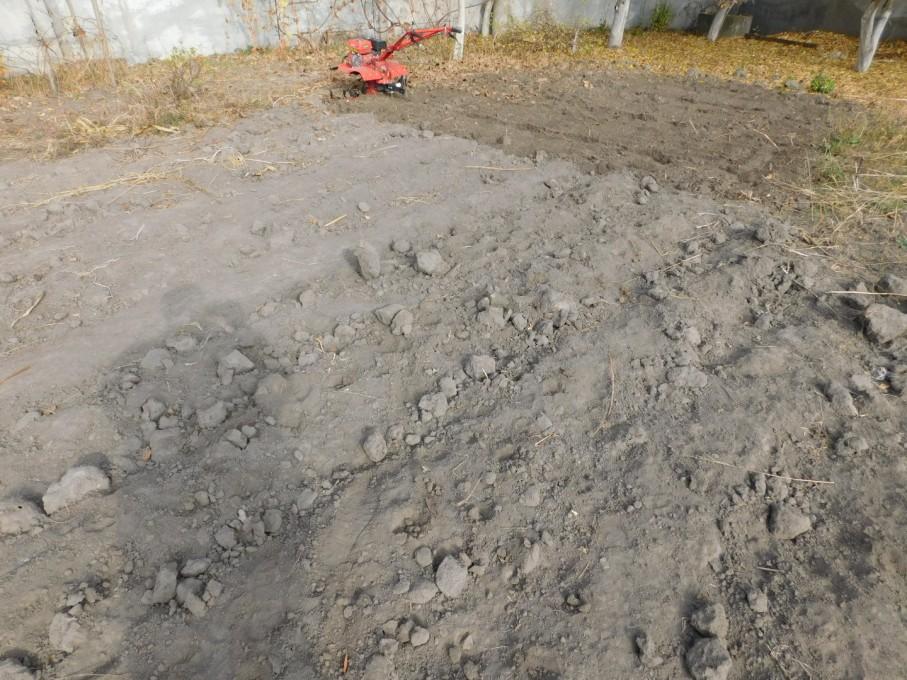
Approximately 15 min of work. I took my time, in 1 pass, the ground is like a stone and dry.
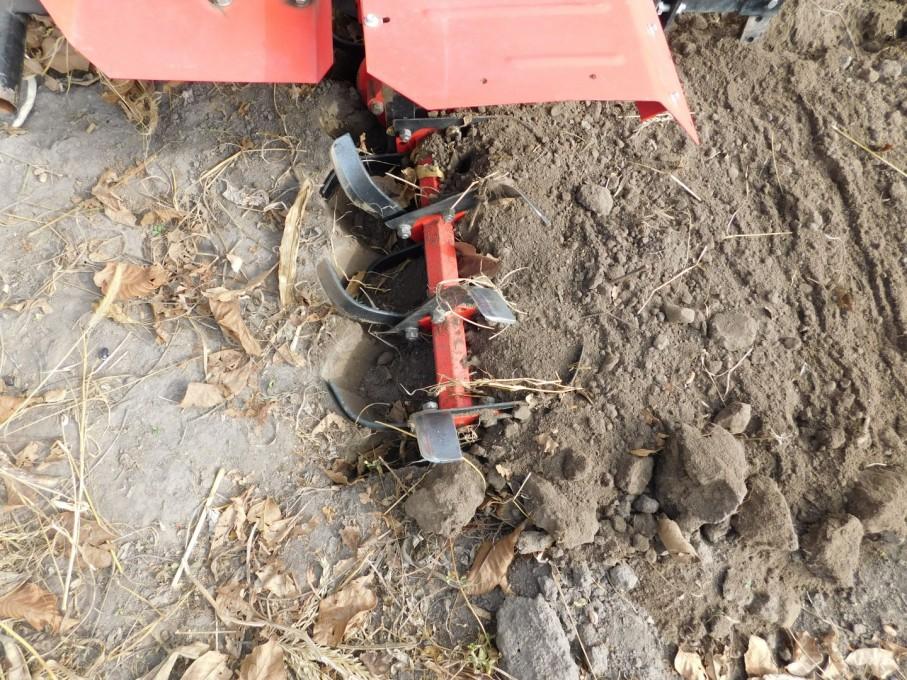
Level of deepening.
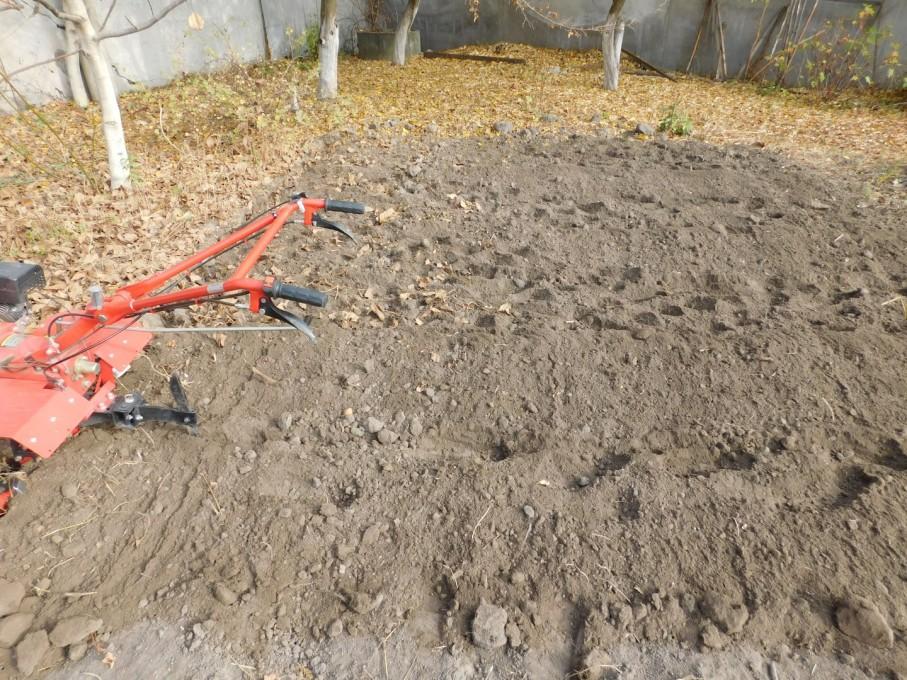
The disadvantage of milling is the trace of the operator, but it can be delayed.
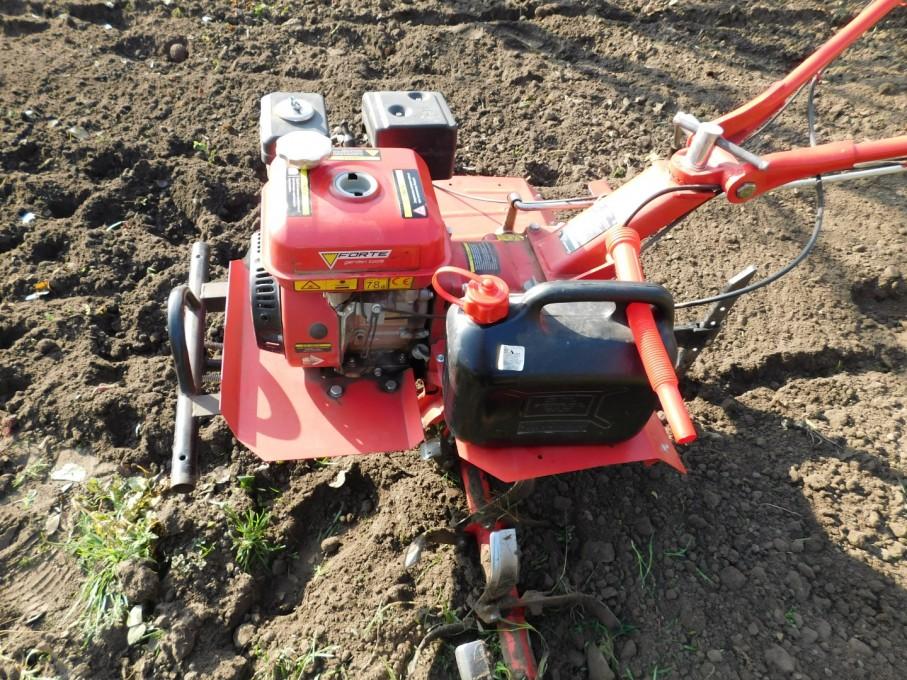
We are refueling. In general, such a canister (5 l) is a good thing.
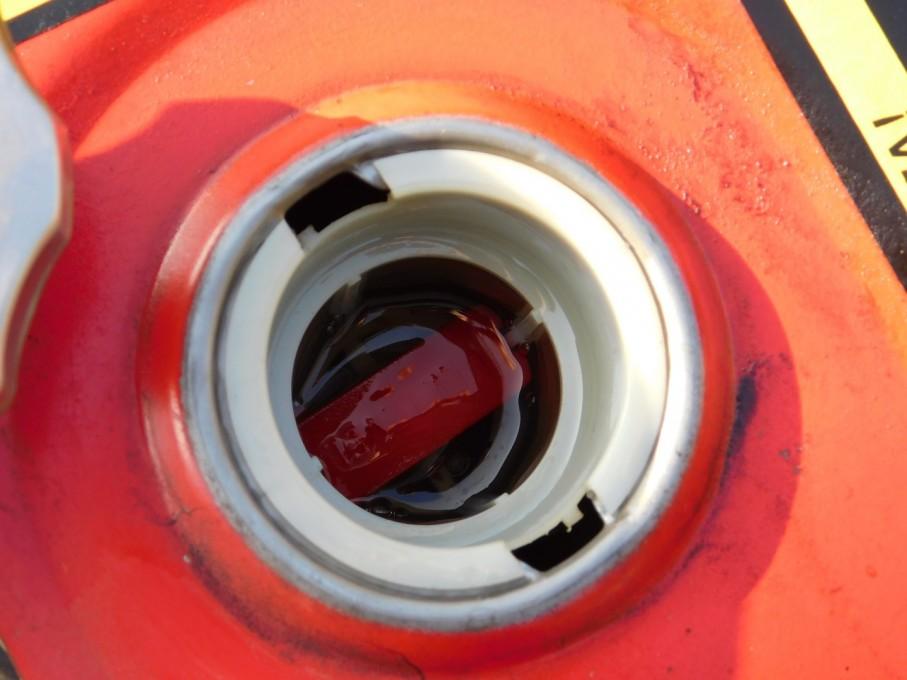
Full tank!
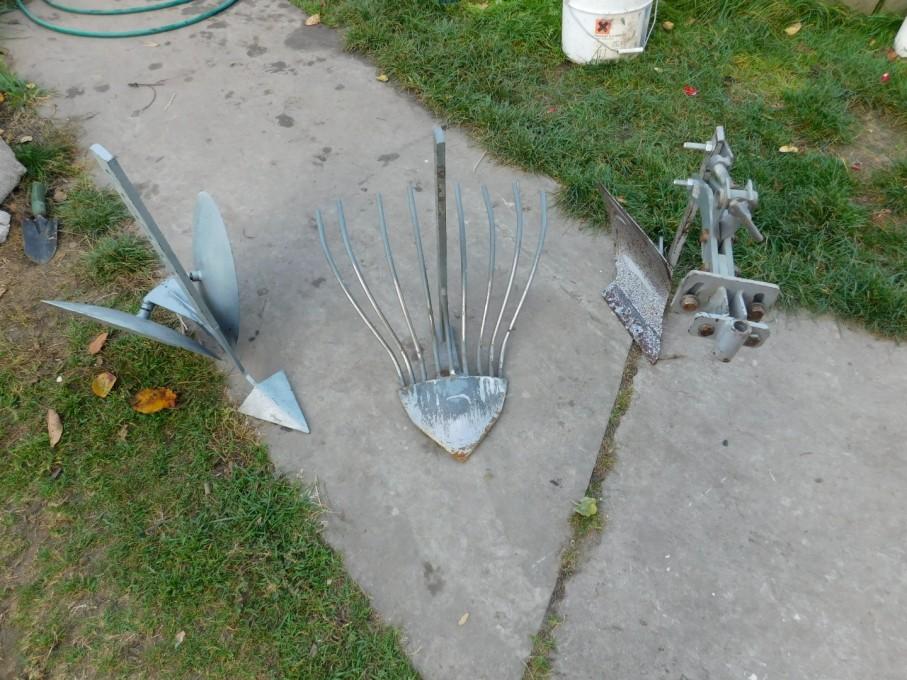
Hinged. This was purchased with a walk-behind tractor right away.
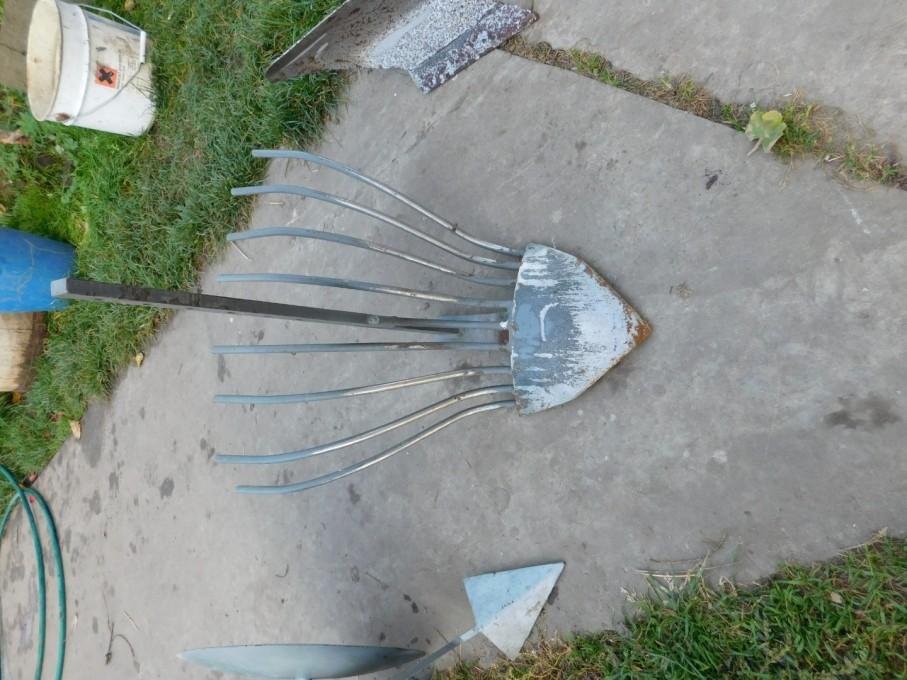
Dolphin potato digger. Nice and cheap stuff. It is worth digging through the row, and then the remaining ones. If you're not in a hurry, then one at a time.
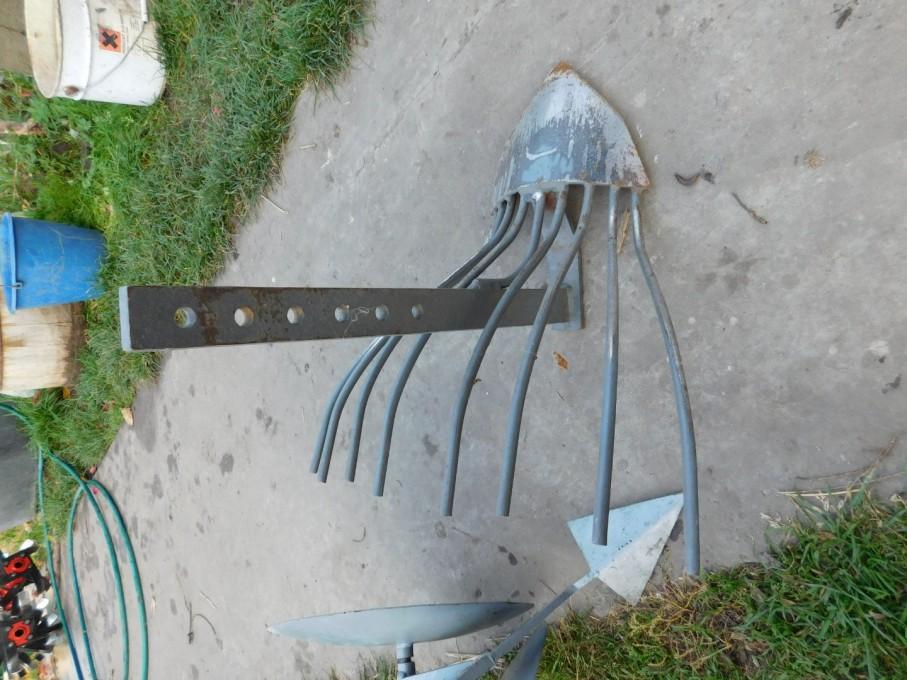
These whiskers bend on heavy or hard ground. But they can be lifted easily, even by hand.
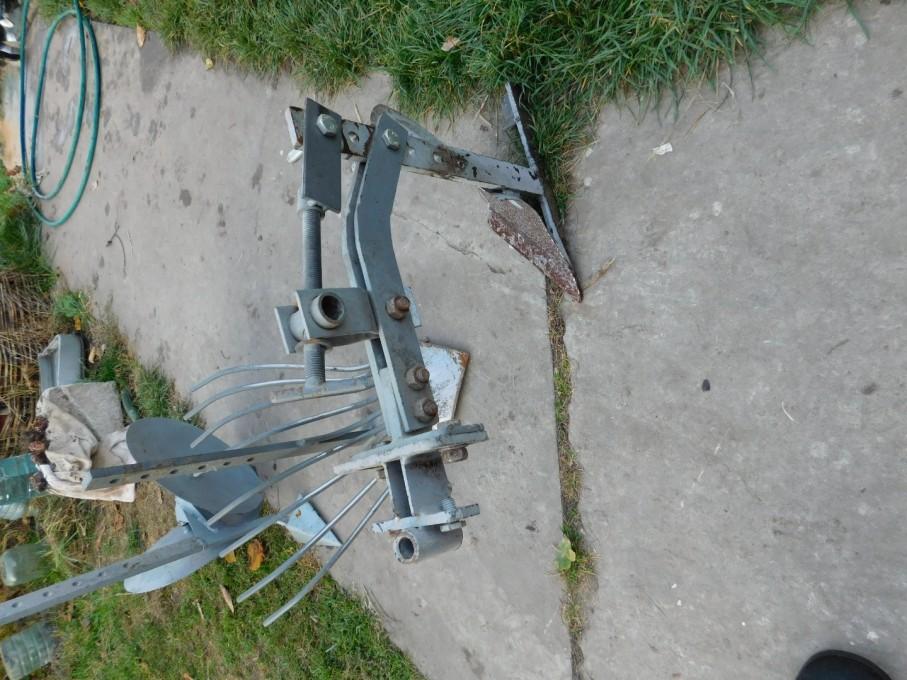
Plow with a universal hitch. Got it especially for a photo shoot.
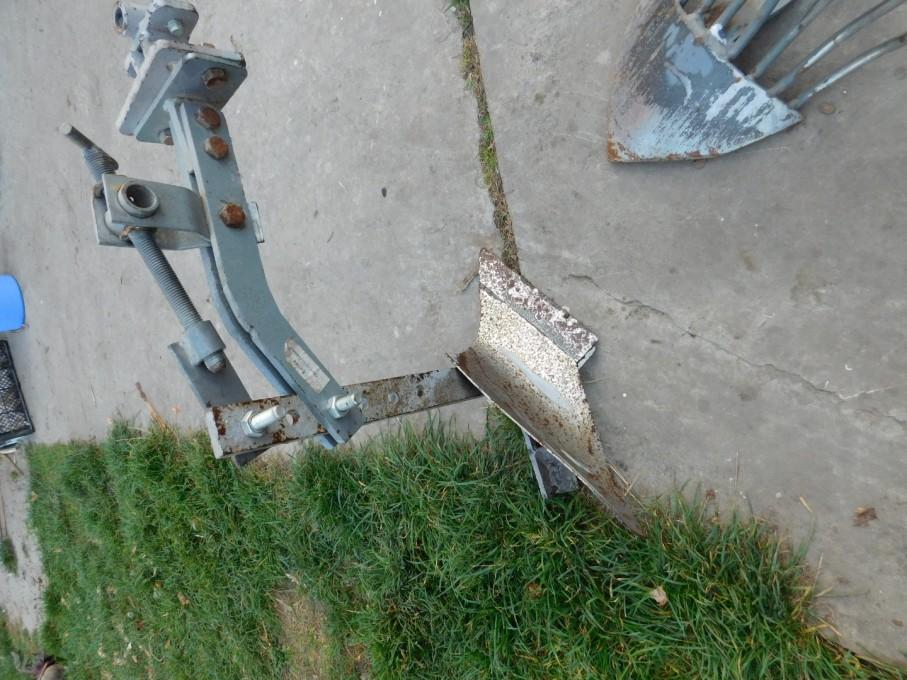
The tilt and angle of attack are adjusted with the clutch.
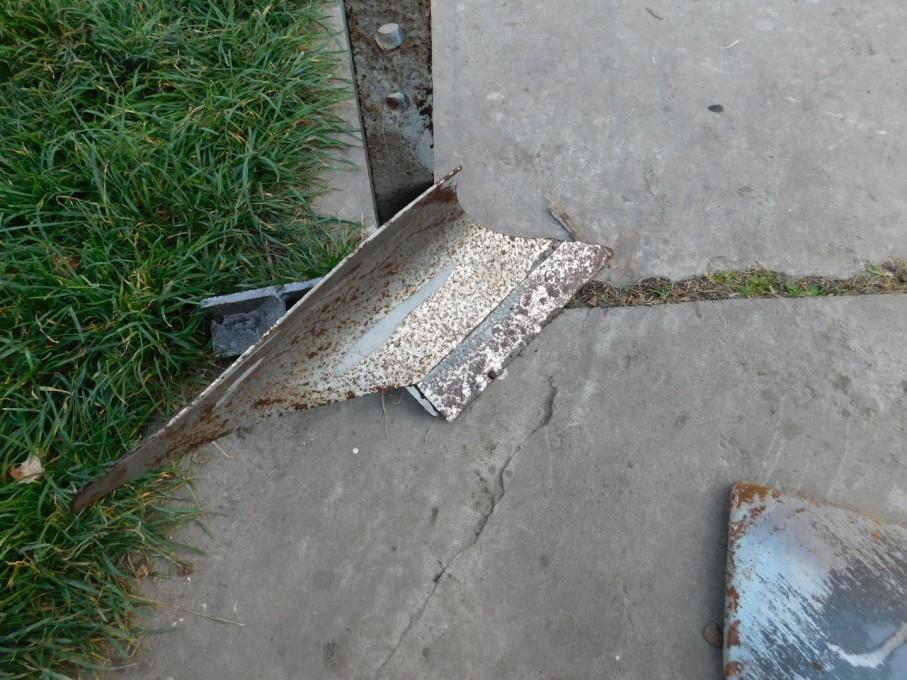
The plow itself. Oh, and he got me in time. Precisely by quality. As well as the clutch (by the way, it's domestic!). The nose of the plow had to be forged by welding and welded stiffeners, because it bent in different directions! And this is a plow blade!
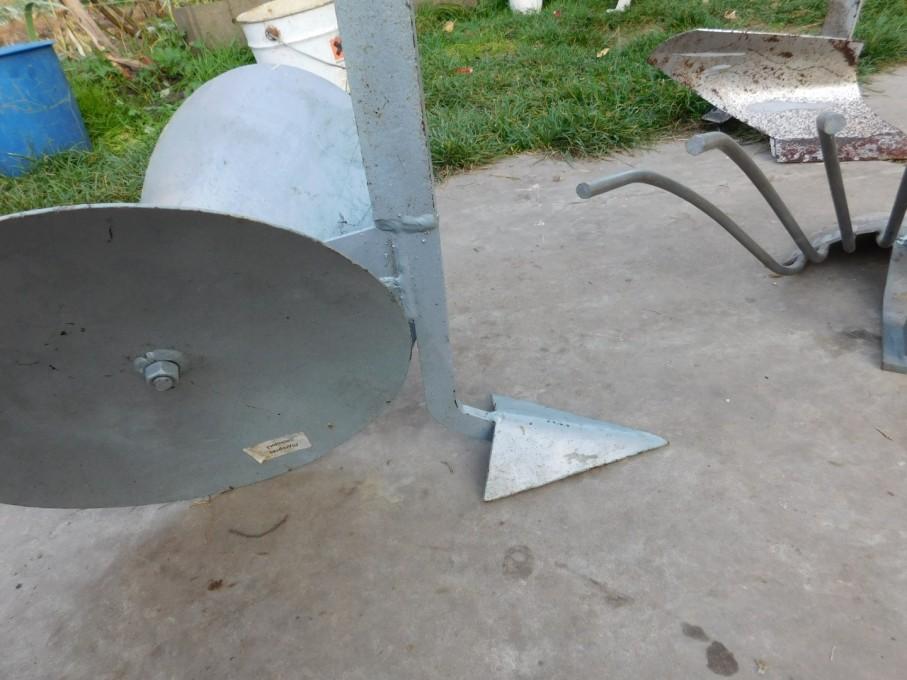
Disk wrapper (okuchnik). Never been at work. First, for normal operation, as it turned out, you need 2 and the corresponding clutch. And the width of the rows. And the corn at the end of the rows, which God forbid you touch! Well, you understand me. In short, the wrapper is just there.
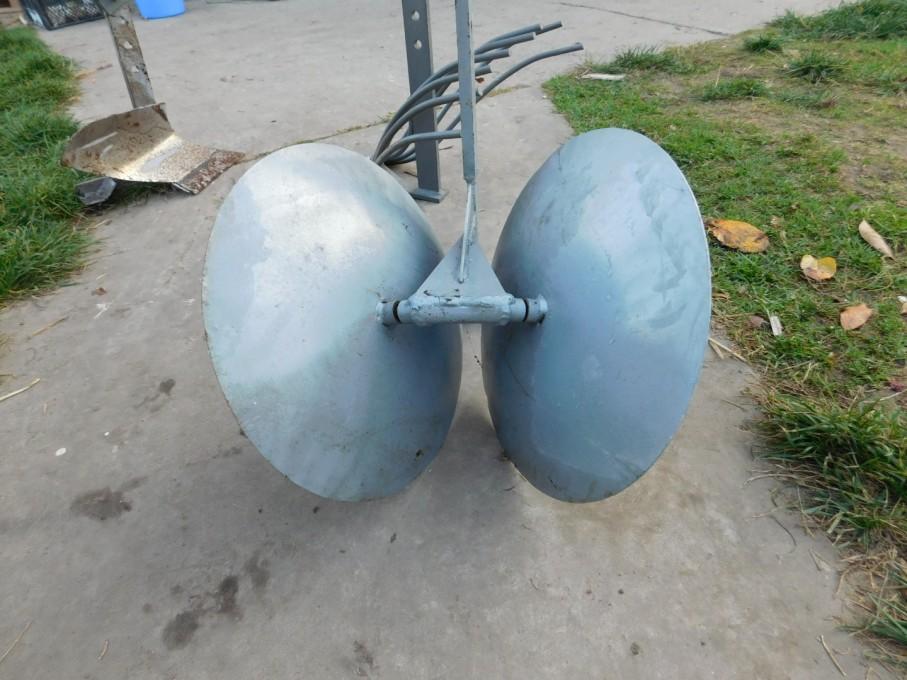
This is how unpretentious it is from the back. In general, disk wrappers/kushniks/spreaders are considered better than classic, shelf ones.
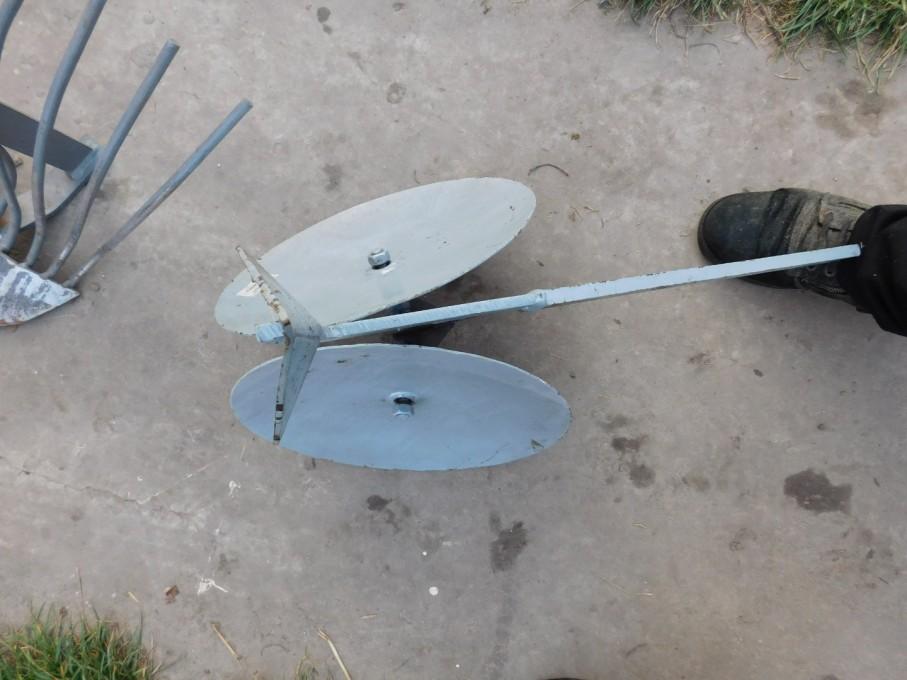
To understand his delight...
And this is a "dolphin". With correct adjustment, it will not crawl deeper because of the support leg below. But be sure to try the adjustment depth on a bad line.
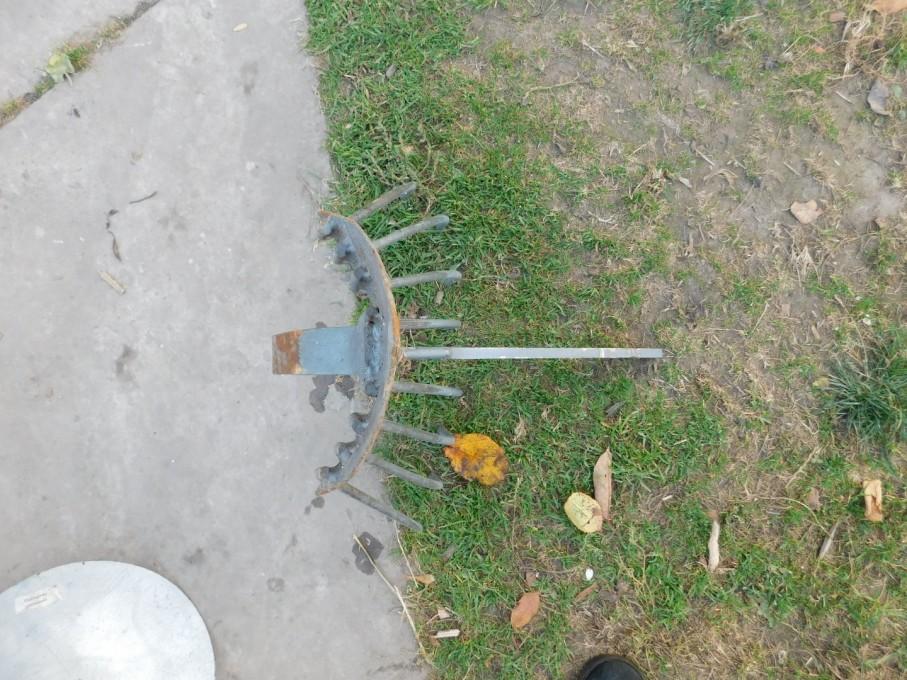
Ground hooks. There is also such a thing. But it's just for now. A useful thing when plowing, but it is necessary to load the walk-behind tractor with weights. We tried to dig potatoes with them - they crush our soil and spoil the tubers.
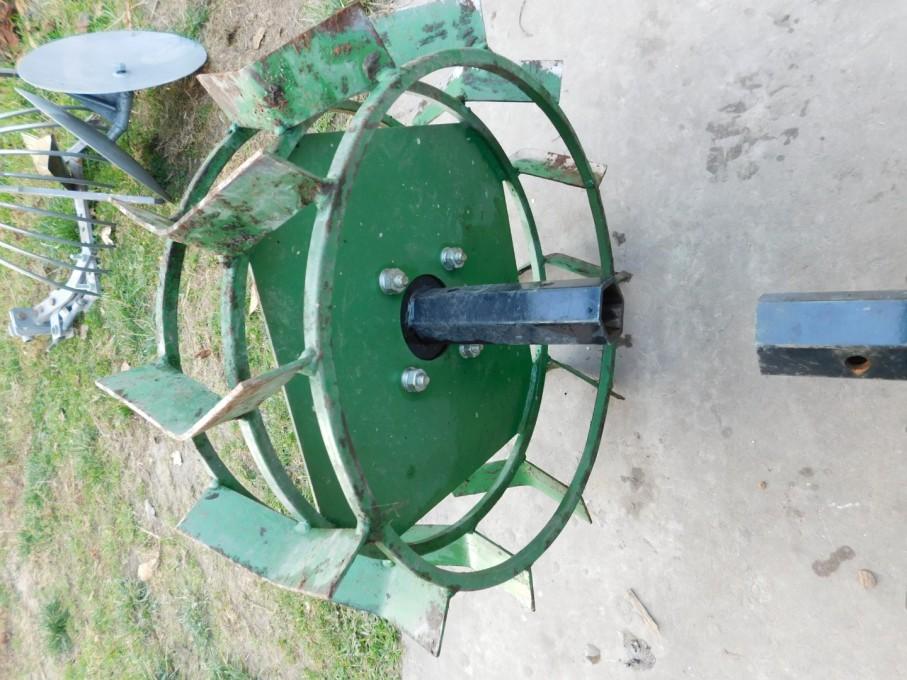
And the soil grippers go without semi-axles. You have to buy them separately, as well as the mounting hardware.
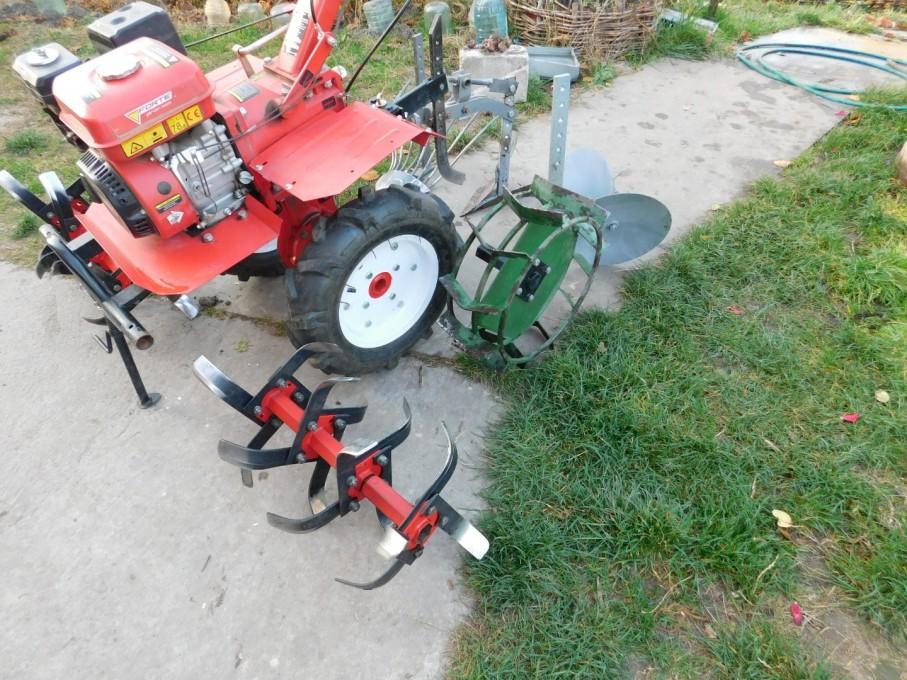
Well, here is my entire "gentleman's" set for the walk-behind tractor. And he was too lazy to get a rotary plow. In general, the money is nowhere to be found... Design, quality... Let your hands not hurt, because who made it! If there is an opportunity, I will make a review that you don't need to buy.
I hope that the information will be useful. And in general, this walk-behind tractor is worth its price. With the hinge...use my experience, or use your wallet to get your own.
Many hinges can be made yourself if you have the skills, tools and metal. But that's all time.
However, I will still struggle with the rotary plow.
The village definitely needs atrailer. You can buy, or you can make it yourself, even better than the factory ones, for example for transporting hay.
It is worth changing the tractor tire to a car tire when mainly transporting goods, at the same time, the speed of movement will be higher and the tread will wear less.
Exactly what is needed for a walk-behind tractor is the health of the operator, because this unit turns, is often pushed by your hands, swings or squats to take a hard area, or on the contrary, get out of a very soft.
Well, the promised data on the walk-behind tractor.
Characteristics of this walk-behind tractor (taken with translation from the website of the official representative of Forte in Ukraine):
- Tool - cultivator
- Country of origin - China
- Warranty - 1 year
- Fuel type - gasoline 95
- Power - 5100 W/7 hp
- Engine model - 170F
- Engine type - four-stroke
- Engine capacity - 196 cm3
- Engine speed - 3600 rpm
- Start type - manual
- Cooling - air
- Fuel tank volume - 3.6 l
- Fuel consumption - 0.7 l/h
- Oil tank - 0.6 l
- Drive type - gearbox
- Transmission - gear reducer
- Number of forward gears - 2
- Number of reverse gears - 1
- Clutch - disk
- Cultivation width - 1050 mm
- Cultivation depth - 300 mm
- Hexagon diameter - 32 mm
- Operating speed - 4-8 km/h
- Dimensions - 1740x980x1050 mm
- Package dimensions - 1050x570x780 mm
- Weight - 100 kg Link to the manual (PDF, 0.9MB)
[email protected]